pks-rancher-reg: Automated PKS Cluster Registration For Rancher

My previous blog showed a method that can be used to stand up Rancher Server in HA on VMware PKS, and I’m going to build on it in this one. Having a Rancher Server environment is great for managing all sorts of Kubernetes clusters from the edge to those hosted in cloud providers, but we can also use it to manage VMware PKS clusters as well. That’s really no secret. However, since PKS focuses on a high degree of difficult automation to produce ready-to-run Kubernetes clusters at the end of the day, wouldn’t it be nice to extend that to making them ready-to-manage as well? In this blog, I’m introducing some nifty, custom automation I built that gets this job done quickly and easily, so once your PKS cluster is built it’s instantly available within Rancher. No manual importation necessary. Let’s go.
If you remember my pks-dns project in which we’re able to auto-create DNS entries, we’re going to leverage the same bootstrapping abilities that Enterprise PKS gives us in a plan through the add-ons option. Just like there, we paste in our YAML manifests of the resources that should be created, and these manifests are automatically applied by the automation when a new cluster is built. This particular pks-rancher-reg automation involves similar pieces: ServiceAccount, ClusterRoleBinding, Secret, and Job.
From a materials standpoint, we need to ensure the following are available.
- Rancher Server with connectivity to our deployed PKS clusters.
- Pre-created Rancher API token for authentication.
- Rancher CA certificate to ensure secure communications.
- A container image housing a script with the registration logic.
Let’s walk through this setup process from start to finish.
First of all, it goes without saying that we need a Rancher Server environment ready to go. Since I’ve already completed the chore of building an HA version riding on PKS, I’m going to use that one. As you can see, there’s really nothing being managed right now other than itself.

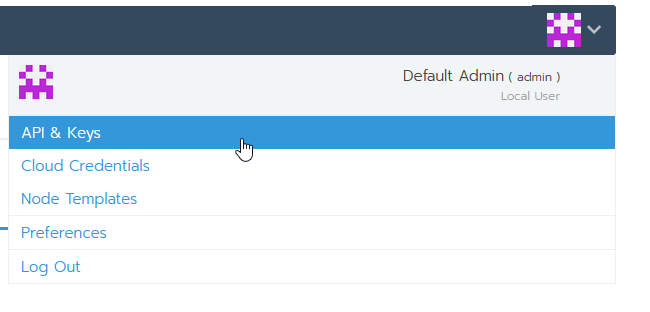
Next, we need to create an API token that we can use to authenticate as the default admin to Rancher to perform these registrations. Navigate to your user avatar icon in the upper-right and go to API & Keys.
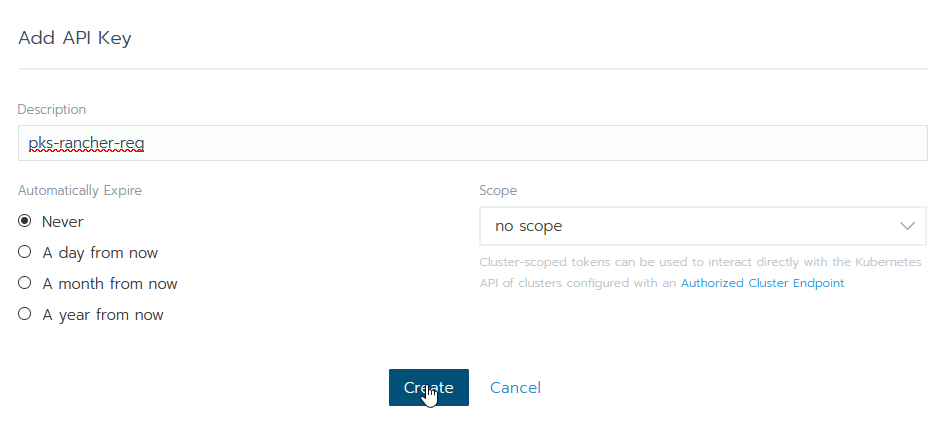
Create a new key and give it a name. Ensure it is globally scoped and set it to not expire.
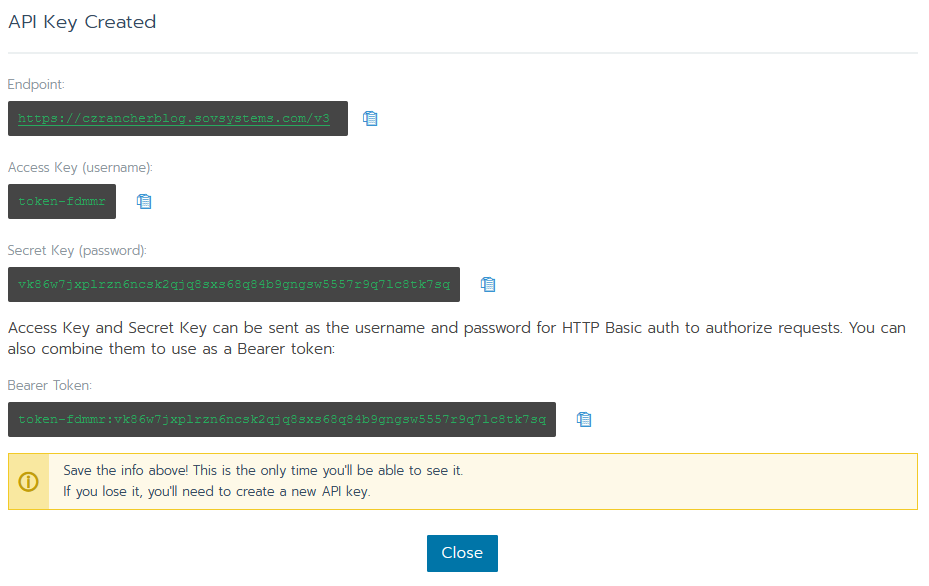
Copy out the Bearer Token value and keep it safe. As stated, you only see this screen once and so if you forget it you’ll have to delete and re-create it.
Next, we need the Rancher CA certificate. Rather than connecting in an insecure manner and potentially exposing our token to a man-in-the-middle attack, we want to ensure that when we fire off this automation that we’re talking to the endpoint we intend.
Go to the Settings menu and click Show cacerts. You should then get your PEM-encoded CA certificate.
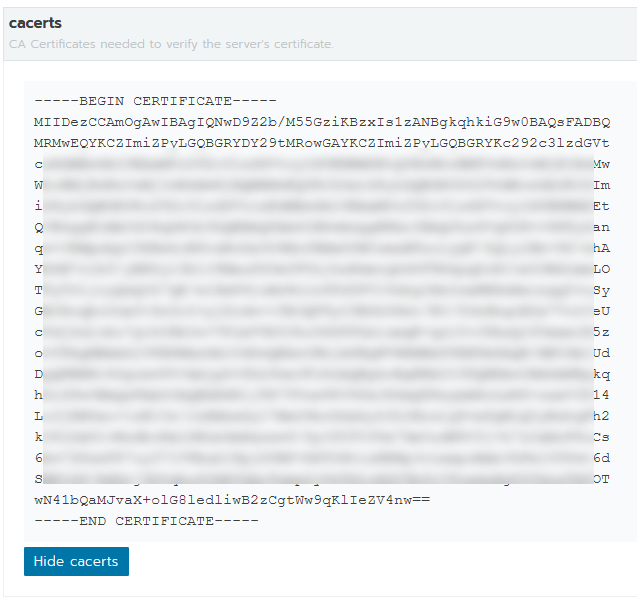
Copy this out to your IDE of choice. We’ll need to manipulate it in a bit.
Now we have all the bits of info from the Rancher side, we need the Kubernetes manifests as well as the container image. Lucky for you, I’ve already done all the work and have produced both of these things, including a pre-built Docker image! Go out to my GitHub repo for the YAML manifests, which contains not only the YAML needed but the raw script itself and a Dockerfile if you wish to build this image yourself. The manifest is already configured to point to the pre-built image out on Docker Hub but you’re welcome to push it to a private registry of your choice and update the manifest. I will note that, as of image 1.0, I am aware that one of the tools I use (jq) is flagged by Clair as having a high vulnerability in this version. This is safe to ignore since the container runs as a job and gets shutdown immediately after completing.
With the YAML manifest in hand, we need to update the Secret with our values taken from Rancher. Kubernetes Secrets are base64-encoded values stored in a key-value pair combination. We’ll need to set those three values in the manifest as base64 values. To do this, the simplest way is to echo the strings into the base64 program and copy the output. Ensure you disable the trailing new line with the -n flag.
1$ echo 'czrancherblog.sovsystems.com' | base64
2Y3pyYW5jaGVyYmxvZy5zb3ZzeXN0ZW1zLmNvbQo=
Copy the resulting value into the manifest. And do the same thing with the token you received earlier.
The last bit to convert is the CA certificate, and this one is a bit more complex because of how Alpine (the image from which my image was authored) reads certificates. We need to ensure the contents of the certificate get sent into base64 as a continual, unbroken line yet that there are line breaks around the header and footers. The easiest way to do this is to copy your CA certificate into an IDE and remove the new line breaks inside the certificate body. You should get something like this.
1-----BEGIN CERTIFICATE-----
2MIIDezCCAmOgAwIBAgIQNwD9Z2b<trimmed>
3-----END CERTIFICATE-----
From here, copy the entire thing into a new file and send that file’s contents to base64.
1$ cat rancher-ca.crt | base64 -w 0
2LS0tLS1CRUdJTiBDRVJUSUZJQ0FURS0tLS0tCk1JSU<trimmed>
You should get one very long line that represents your entire CA certificate which is base64 encoded. Paste that value into your manifest. You’re done here.
Once the manifest is completed (remember to update the image sections if you built a custom image), we can simply copy and paste it all into the Add-Ons section of a PKS plan.
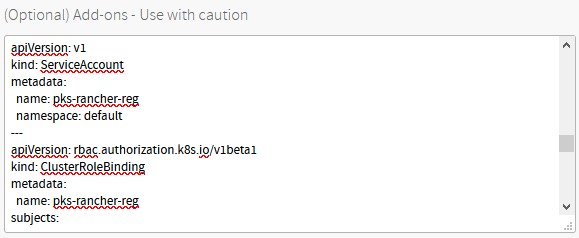
You also need to ensure the Allow Privileged checkbox is enabled on this plan due to the Rancher agents and their requirements.
Save the plan, apply changes, and let’s build a test cluster. I’ll call it “czk8s03”.
 1$ pks create-cluster czk8s03 -e czk8s03.sovsystems.com -p dev-tiny
 2
 3PKS Version:              1.5.0-build.32
 4Name:                     czk8s03
 5K8s Version:              1.14.5
 6Plan Name:                dev-tiny
 7UUID:                     a8c48818-8197-4c70-b968-695f5e8eeab0
 8Last Action:              CREATE
 9Last Action State:        in progress
10Last Action Description:  Creating cluster
11Kubernetes Master Host:   czk8s03.sovsystems.com
12Kubernetes Master Port:   8443
13Worker Nodes:             1
14Kubernetes Master IP(s):  In Progress
15Network Profile Name:
16
17Use 'pks cluster czk8s03' to monitor the state of your cluster
I’ve put this manifest in a plan called “dev-tiny” which also has my pks-dns manifest inside. If you’re chaining manifests together like this, YAML syntax requires three dashes to separate components. It’s always preferable if, any time you write YAML, you begin the file with those three dashes to allow for simple concatenation later on.
After we wait a few minutes, we can see our new PKS cluster has materialized in Rancher.
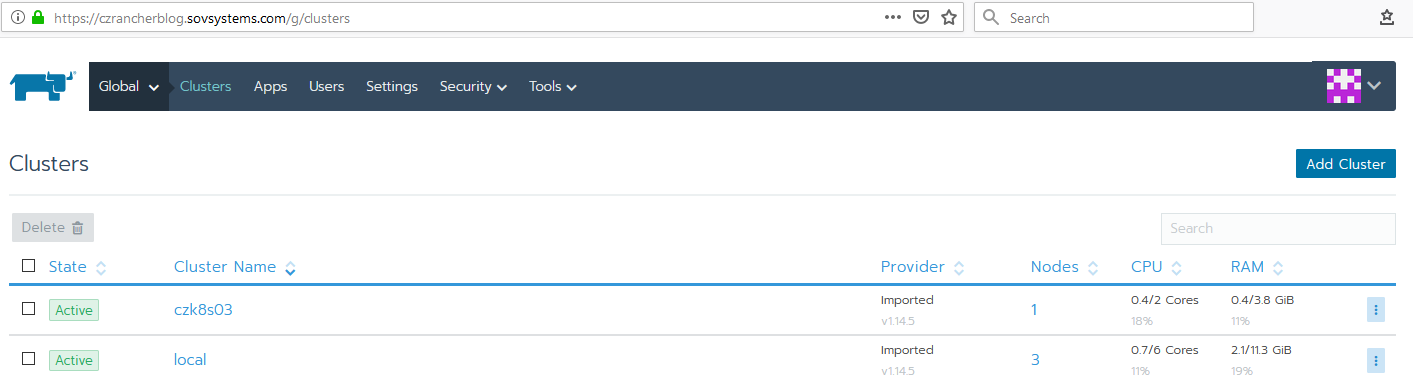
Now once registered, we can treat it just like any other Rancher-managed cluster. Pretty convenient, right?
Also, hearkening back one last time to my pks-dns project, remember that we have a Secret resource that is still saved within Kubernetes. Since base64 is an encoding and not an encryption, any user with permissions to read secrets can ultimately obtain the value. This may be undesirable if you’re allowing various types of users to provision their own clusters and who shouldn’t necessarily have administrative access to Rancher as well. So, because of that, if you peek into the manifest we’re using an initContainer to do the heavy lifting, then coming behind it and delete that secret. All you’ll see when you come into the cluster when inspecting the Pod logs are the following.
1$ k get po
2
3NAME                    READY   STATUS      RESTARTS   AGE
4pks-dns-zfb9l           0/1     Completed   0          7m10s
5pks-rancher-reg-t7j7d   0/1     Completed   0          7m10s
6
7$ k logs pks-rancher-reg-t7j7d
8
9secret "pks-rancher-reg" deleted
Nice and clean, ready to go, and all registered in Rancher.
So there you have it, complete and automated registration of your PKS clusters into a Rancher server running on-premises. Extend it even further by layering in pks-dns and automatic scheduling of Optimize-VMwarePKS and you have quite a nicely-automated and repeatable way for producing clusters which have management capabilities and are nicely organized in your inventory.
As always, I hope this is useful, and I always like hearing feedback. Please do drop me a line on either GitHub, Twitter, or LinkedIn!