Antrea: The Ubiquitous CNI

About six months ago, a new container network interface (CNI) was released to the world, this one coming out of VMware called Antrea. I had heard positive things about this new CNI and although I thought "great, yet another CNI", I decided to dive in, take a look, and see why the community needed a new one. It turns out that we do, so in this article I'm going to discuss a little of why Antrea is particularly valuable (and needed), show the installation of Antrea with some non-default configured options, and look at monitoring. But I'm going to put a slight spin on it in that this will assume an air gapped installation with Windows-centric monitoring in mind.
Antrea is a new CNI the goal of which is to run anywhere, offer extremely high performance, and offer a rich set of Kubernetes networking features. It is based on the Open vSwitch project (OVS) which has been around for about a decade and has massive support and development contribution from the community. Antrea is unique in this regard. So why was OVS a good choice and what can it bring to the Kubernetes table? As mentioned, it has been around for about a decade and is widely used in production. Since about kernel v3.3, it is included by default in most Linux distributions and can be found even in some of the newer, cloud-specific distros like AWS' Bottlerocket and others. It supports high-performance packet IO and is easy to offload to hardware and also has support for DPDK and other APIs that aim to increase processing speeds. As such, it's commonly seen in telco environments where extremely high throughput and low latency are needed. And, lastly, OVS is portable since it's software. It provides the same data plane for Linux and Windows, which means that the implementation is largely common (minus some plumbing) across those two platforms.
With that said, why do we need Antrea and what can we expect? Antrea is another option to more common CNIs like Calico and Flannel. Antrea offers overlay-based networking, IPsec encryption for node-to-node traffic, support for Kubernetes NetworkPolicy objects, and in time will even serve as an underlying implementer of ClusterIP services so that kube-proxy is no longer needed. But the "why" is more interesting: Antrea doesn't rely on Linux networking primitives because it uses OVS. And, as mentioned, OVS supports Windows, which means Windows is a first-class citizen in a time when most other CNIs either have no or experimental support for it. In time, as Windows in Kubernetes matures, this will be significant. Again, owing to the fact OVS is used, it can be that ubiquitous CNI running anywhere: public cloud, vSphere, bare metal, DIY, whatever. It also supports deep introspection into the networking fabric using multiple tools and techniques. And, lastly, it uses native Kubernetes design principles and so closely follows those development paradigms. Hopefully in the future, we can see BGP peering support, ClusterIP, and some other nice functionality make it in.
With that, let's get into it and stand it up in a simple Kubernetes cluster provisioned by kubeadm. In my lab, I dusted off some Ubuntu 16.04 VMs that are fairly simply configured having only Docker, swap off configured in /etc/fstab, my public key added to authorized_keys, and my custom root CA added to /etc/docker/certs.d/ so I can push/pull images from my Harbor registry. Unlike most guides that assume every system has wide-open access to the Internet, I'm doing things a little differently and will show an air gapped install.
So, first things first: Clone (or otherwise build) those Kubernetes nodes. I've done two.
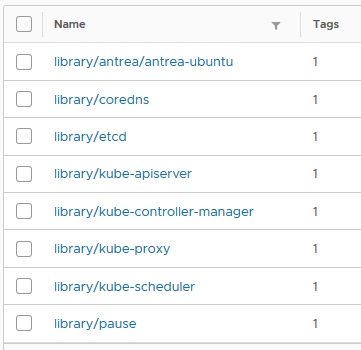
Once those are up and online, we need to ensure the Kubernetes images are present in our registry. As of this writing, the most current release is Kubernetes 1.18.4, and so since I'll be doing a simple kubeadm deploy, these are the images that will be needed.
1kube-proxy:v1.18.4
2kube-scheduler:v1.18.4
3kube-apiserver:v1.18.4
4kube-controller-manager:v1.18.4
5pause:3.2
6coredns:1.6.7
7etcd:3.4.3-0
Of course, you're welcome to pull and push them manually from a jump host, or you can use a very quick-and-dirty script I wrote here to get it done quickly. I use Harbor locally, so that's where I pushed them.
While you're at it, manually pull the image we'll use for Antrea called antrea/antrea-ubuntu:latest. If you prefer to use version numbering semantics for the tags, which I recommend in production, ensure you specify the required one from the releases page. So, as of this article, that would be antrea/antrea-ubuntu:v0.7.2. Push it to your registry, because we'll need it shortly. Your images should now all be present locally.
With that complete, let's bootstrap this cluster. If these nodes are connected to the Internet, you can follow the instructions here, but I'm assuming you've already done them. From a shell on what will be the control plane node, run kubeadm and pass in the location of your images and, importantly for Antrea, the pod network CIDR you wish to use. In order for Antrea to work properly, kube-controller-manager needs to be started with the NodeIpamController feature, and when using this parameter with kubeadm it'll get that. I'm speciying a /16 network here from which a single /24 will be taken for each node.
1sudo kubeadm init --kubernetes-version=1.18.4 --image-repository=harbor.zoller.com/library --pod-network-cidr=10.12.0.0/16
After ensuring the control plane builds successfully, join the worker node with the command provided at the terminal. The one below is just for illustration purposes.
1sudo kubeadm join 192.168.1.94:6443 --token nlkn3c.5fou6n42ojfvn5ar --discovery-token-ca-cert-hash sha256:9e046df819de783d4d380f7c196d0afaeff7c6568b00c8e640c3a7916a44f594
If both complete, back on the control plane, move the kubeconfig into place so we can interact with the cluster.
1mkdir -p $HOME/.kube && sudo cp -i /etc/kubernetes/admin.conf $HOME/.kube/config && sudo chown $(id -u):$(id -g) $HOME/.kube/config
Now check the status of your nodes.
1$ k get no
2NAME       STATUS     ROLES    AGE   VERSION
3antk8s03   NotReady   master   34s   v1.18.4
4antk8s04   NotReady   <none>   6s    v1.18.4
We can see they're in a status of NotReady because the CoreDNS pods are in a pending state. Our CNI hasn't been installed, which is why. Let's now install Antrea. The instructions on the getting started guide are good, but I'll make a couple modifications. First, let's pull down the manifest and simultaneously replace the images with the ones we stored manually. Here's a nice one-liner you can reuse in the future for other manifests.
1curl -s https://raw.githubusercontent.com/vmware-tanzu/antrea/master/build/yamls/antrea.yml | sed "s|image: antrea/antrea-ubuntu:latest|image: harbor.domain.com/library/antrea/antrea-ubuntu:latest|" >> mod.yml
This simply grabs the YAML, replaces the image: string as specified, replaces it with yours, and dumps it out to a new file called mod.yml. Very simple.
With mod.yml on the filesystem, let's make a couple changes.
Antrea will, by default, use VXLAN for its overlay. There are several other choices including GENEVE and GRE, but VXLAN is the default. Another nice option it has is a Hybrid mode where it will not use encapsulation if the nodes are L2 adjacent but will use encapsulation selectively if they're over L3. I'm going to enable hybrid mode. Second thing is to expose the Prometheus metric endpoint for the agents. Both of these options are easily configured by editing the ConfigMap used by Antrea.
Open your mod.yml file and find the ConfigMap. Find the section for antrea-agent.conf and uncomment the trafficEncapMode option, then change encap to hybrid. This will enable hybrid encapsulation mode. Second, uncomment the enablePrometheusMetrics line and flip false to true. If you want Prometheus metrics enabled for the controller as well, repeat the process for the antrea-controller.conf section.
When those edits are complete, apply the manifest.
 1$ k apply -f mod.yml
 2customresourcedefinition.apiextensions.k8s.io/antreaagentinfos.clusterinformation.antrea.tanzu.vmware.com created
 3customresourcedefinition.apiextensions.k8s.io/antreacontrollerinfos.clusterinformation.antrea.tanzu.vmware.com created
 4customresourcedefinition.apiextensions.k8s.io/traceflows.ops.antrea.tanzu.vmware.com created
 5serviceaccount/antctl created
 6serviceaccount/antrea-agent created
 7serviceaccount/antrea-controller created
 8clusterrole.rbac.authorization.k8s.io/antctl created
 9clusterrole.rbac.authorization.k8s.io/antrea-agent created
10clusterrole.rbac.authorization.k8s.io/antrea-controller created
11clusterrolebinding.rbac.authorization.k8s.io/antctl created
12clusterrolebinding.rbac.authorization.k8s.io/antrea-agent created
13clusterrolebinding.rbac.authorization.k8s.io/antrea-controller created
14configmap/antrea-ca created
15configmap/antrea-config-mf4t8c67c8 created
16service/antrea created
17deployment.apps/antrea-controller created
18apiservice.apiregistration.k8s.io/v1beta1.networking.antrea.tanzu.vmware.com created
19apiservice.apiregistration.k8s.io/v1beta1.system.antrea.tanzu.vmware.com created
20daemonset.apps/antrea-agent created
Let's check our nodes once again.
1$ k get no -o wide
2NAME       STATUS   ROLES    AGE   VERSION   INTERNAL-IP    EXTERNAL-IP   OS-IMAGE             KERNEL-VERSION      CONTAINER-RUNTIME
3antk8s03   Ready    master   20m   v1.18.4   192.168.1.94   <none>        Ubuntu 16.04.6 LTS   4.4.0-131-generic   docker://19.3.11
4antk8s04   Ready    <none>   20m   v1.18.4   192.168.1.95   <none>        Ubuntu 16.04.6 LTS   4.4.0-131-generic   docker://19.3.11
And also verify everything's good.
1$ k get cs
2NAME                 STATUS    MESSAGE             ERROR
3controller-manager   Healthy   ok
4scheduler            Healthy   ok
5etcd-0               Healthy   {"health":"true"}
With that, we're ready to roll. You should be able to test out NetworkPolicy objects if you want now. I won't go over that because it's well documented elsewhere.
Last thing I want to show is monitoring. Antrea also has a very convenient plug-in for Octant, and if you're not familiar with Octant I recommend taking a look. It's a really nice graphical dashboard for Kubernetes clusters which runs outside of the cluster by parsing your kubeconfig. Installation is extremely straightforward as well. On Windows, it can be installed with Chocolatey using choco install octant. The current version of this writing is 0.13.1.
Running Octant is also as simple as calling octant from a shell. Provided that it can read your kubeconfig in the default location, the dashboard should open in your browser giving you access to whatever contexts you have configured. Back to the plug-in for Antrea, this allows Octant to have some extra visibility into Antrea and its CRDs. There is a very simple documented way to run Octant along with this plug-in inside the cluster as a pod, so if you're interested in that do check it out. However, in this case I want to show a more "production" approach by keeping your Octant installation local and having access to the plug-in. I also want to show how Windows can be used if that's your main workstation.
Unfortunately, Antrea doesn't provide pre-compiled binaries of this Golang-based plug-in, but that's easily fixed. For this demo, I'm assuming you already have Go installed and functional on your Windows box. If not, once again turn to Chocolatey.
First, clone the Antrea git repo.
1git clone https://github.com/vmware-tanzu/antrea
Next, cd into the directory containing the go file for the plugin at antrea\cmd\antrea-octant-plugin.
Build the plug-in with go using go build -o octant-antrea.exe main.go.
If this is your first time building from source, it'll take a minute and pull down a number of dependencies. At the end, you should have octant-antrea.exe built as a binary.
We're just about ready to launch Octant and see this plug-in, but one last step remains. Currently, this plug-in needs to read your kubeconfig but it must do so from an environment variable and can't use the --kubeconfig flag that Octant can. Launching this with Linux or MacOS is fairly easy since we can specify that variable at the command line. In Windows, it seems we must provide this as a system variable. Configure your KUBECONFIG variable using setx KUBECONFIG C:\path\to\kubeconfig /m and restart your shell. Verify the variable is set using echo %KUBECONFIG%.
1C:\Users\Chip>echo %KUBECONFIG%
2C:\Users\Chip\.kube\config
Now we can call Octant on the command line passing in the location of our newly-built Antrea plug-in binary. I put mine in ~/.config/octant/plugins to be consistent with other platforms, but just so long as it can be read. Start Octant passing that path.
1octant --plugin-path C:\Users\Chip\.config\octant\plugins
It should now launch the Octant dashboard for you listening on localhost using port 7777.
On the side bar, you should now have a nifty "Antrea Information" panel with a couple of resources that show info on the Antrea controller and the agents.
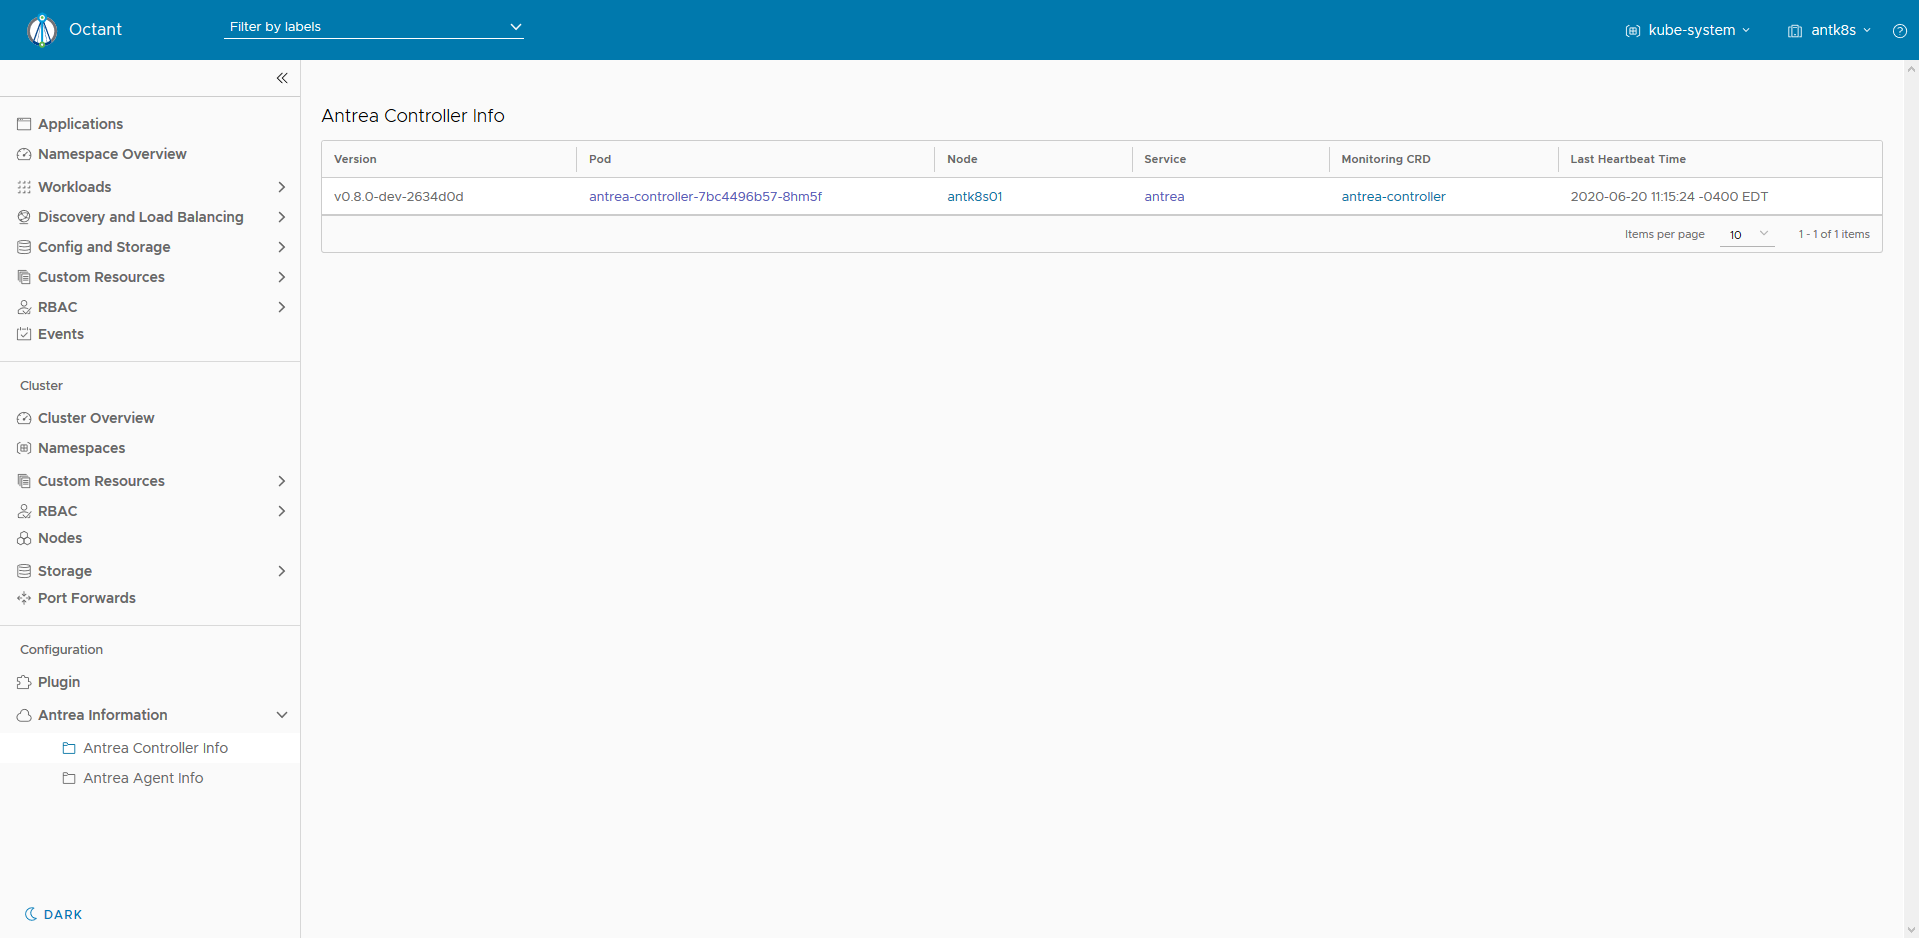
Clicking on the Antrea Agent Info pane will show your agents and some helpful information there as well as the CRDs associated with them.

Although it's fairly basic, it does help in providing a little more info, especially if you'd like a graphical way to understand how the pieces fit together. I do hope this plug-in continues to be developed.
And that's all for this one. I stepped through an offline installation of a simple Kubernetes cluster using kubeadm along with Antrea, built the Antrea plug-in from source, and then ran Octant on Windows showing the type of extra info it delivers.
I'm excited to monitor the trajectory of this project as I think it'll become not only VMware's ubiquitous CNI of choice, but very likely be adopted across the board by many others. Especially as Windows worker nodes come into greater maturity in the Kubernetes project, having one CNI that uses uniform tools and works similarly across both Linux and Windows will be a great boon for operators everywhere.