Installing vRealize Automation software components as a specific user

Since I’ve been working with software components in vRealize Automation (vRA), one of the difficulties I see come up time and time again in Windows environments is the need to run a specific command or component with specific credentials. This is quite common even outside of the scope of vRA. There are multiple ways to go about doing this when talking about PowerShell and I won’t cover them all here. But sometimes, for one reason or not, those methods don’t work—especially when dealing with some specific programs that require elevation. Because of this, I came up with a rather nifty workaround for these specific scenarios that you may need to invoke at some point. This involves changing the account used to run the vRA software agent during the machine provisioning process. Read on to see how to go about this.
When one installs the various vRA agents on a Windows template, one has the choice of the account used to run those agents. There are two options: local user or local system. Prior to circa vRA 7.2, the only option was to run the software agent as a local user called “darwin” yet this meant many users had difficulties when needing to run commands that required lower-level system access. VMware solved this by adding the option to run the agent as local system, and this tends to be the option I see employed most often. While this works for the vast majority of customers and in the vast majority of software components (hereafter SCs), some do require specific accounts. I was recently working with a customer who fell into this category. Specifically, we were trying to install the VMware Horizon View Connection Broker as a service on Windows servers. I had not ever worked with deploying this component, but as I understand it the EXE can only be installed by specifically “allowed” users carrying certain permissions. Attempts to run as that user failed when the vRA software agent ran as system as did traditional elevation methods, so I had to find another way.
I took to PowerShell to find out how to manipulate this agent, which runs as a Windows service. After lots of trial and error (and frustration), I eventually created a working script and process which changes the service user account before vRA begins running software components. Effectively, we can use the guest agent to invoke a script stored on the template to change the account used by the vRA software bootstrap agent. Since these are two totally separate agents and the guest agent runs before any SCs do, it allows us the ability to make this change without disrupting any SCs. There are other ways of making a similar change, but do note that this alteration cannot be made as a SC itself for a couple reasons I’ll skip.
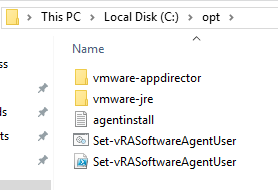
First thing to do is head on over to my GitHub repo chipzoller/Set-vRASoftwareAgentUser and either do a git clone or simply pull down the .CMD and .PS1 files. Copy them to your Windows template in a location that the guest agent can access. I did this in C:\opt because it’s hidden from user view and already is the home directory for the software bootstrap agent. Keep in mind if using UAC that this directory may pose a problem.
Let’s take a peek inside the .CMD file to see how this is working.
1echo off
2set arg1=%1
3set arg2=%2
4powershell.exe -ExecutionPolicy Bypass -File C:\opt\Set-vRASoftwareAgentUser.ps1 -userName %arg1% -userPass %arg2%
It’s very, very simple. We are providing two arguments that are positional to be passed into the PS1 script at run-time. These arguments will be the username and password of the account we wish to run the software bootstrap agent. I’ll get to that in a minute. From there, we simply call PowerShell, the file, and give it those arguments. The PS1 script does the rest.
Now with those scripts on your template, you can shut it down once again. We need to head into vRA to create some custom properties. I find this easiest to do so by creating a property group, so go to Administration => Property Groups. We need to create a few different custom properties, and I’ll walk through them briefly. By the way, if you want a deeper dive on the guest agent and how to control it, I highly recommend my three-part series covering guest agent here.
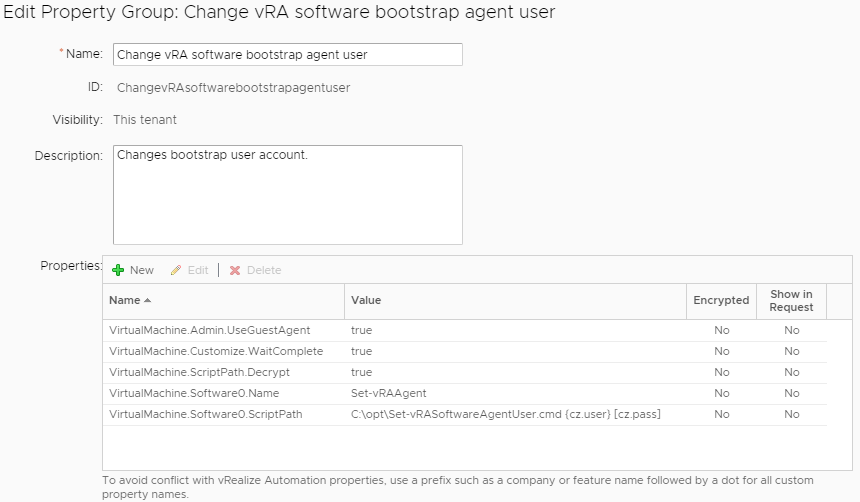
Starting from the top in the screenshot there, here’s what we’re creating.
1VirtualMachine.Admin.UseGuestAgent = true
This custom property tells vRA to invoke the guest agent to do something. It’s required to use the guest agent.
1VirtualMachine.Customize.WaitComplete = true
Wait until all customization tasks are done that utilize the guest agent. Depending on what else you may be doing, you could have none of these, but it’s still best to use it.
1VirtualMachine.ScriptPath.Decrypt = true
A largely unknown custom property which allows us to pass encrypted custom properties. Hold your horses here, too.
1VirtualMachine.Software0.Name = Set-vRAAgent
Before we tell the agent what script to invoke, we must give it a name. The value of this can be anything.
1VirtualMachine.Software0.ScriptPath = <path_to_script> {prop1} [prop2]
The actual script to launch with the parameters to be passed. More on this below.
Ok, so more details on a couple of those. Because this script takes in a username and password combo, we need to source them from some place. Yes, you could certainly write them in the value of VirtualMachine.Software0.ScriptPath if you really wanted. This would do two things: 1) make your property group credential-specific (in case you needed multiple run-as accounts; meaning more property groups); and 2) expose a password in plaintext which an end user could possibly find. Instead of this, we can actually take in the value of other custom properties to be used as parameters. In my screenshot, you can see I’m using {cz.user} and [cz.pass]. This means I have these custom properties set elsewhere in vRA. In fact, I have them defined at the business group level.
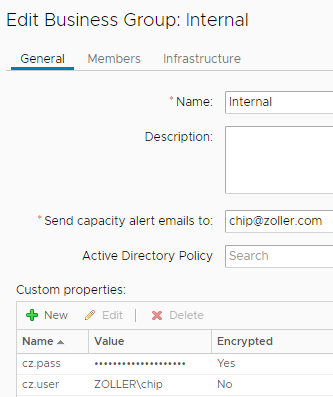
In the case of this customer, every business group has its own Active Directory domain and so the software agent needs to run as a domain administrator for every business group. Due to this, we don’t want to hard-code those values. Now, if you refer back to my screenshot showing all those custom properties, you’ll notice cz.user is in braces ({}) while cz.pass is in brackets ([]). Why? Well, because our password is encrypted as you can see. And in order to get those properties to replace their values, vRA has a simple syntax for doing so. Non-encrypted custom properties can be substituted with braces but encrypted properties demand brackets. By adding the custom property VirtualMachine.ScriptPath.Decrypt we are instructing the guest agent to decrypt that cz.pass custom property, otherwise the script would fail. Pretty cool, huh?
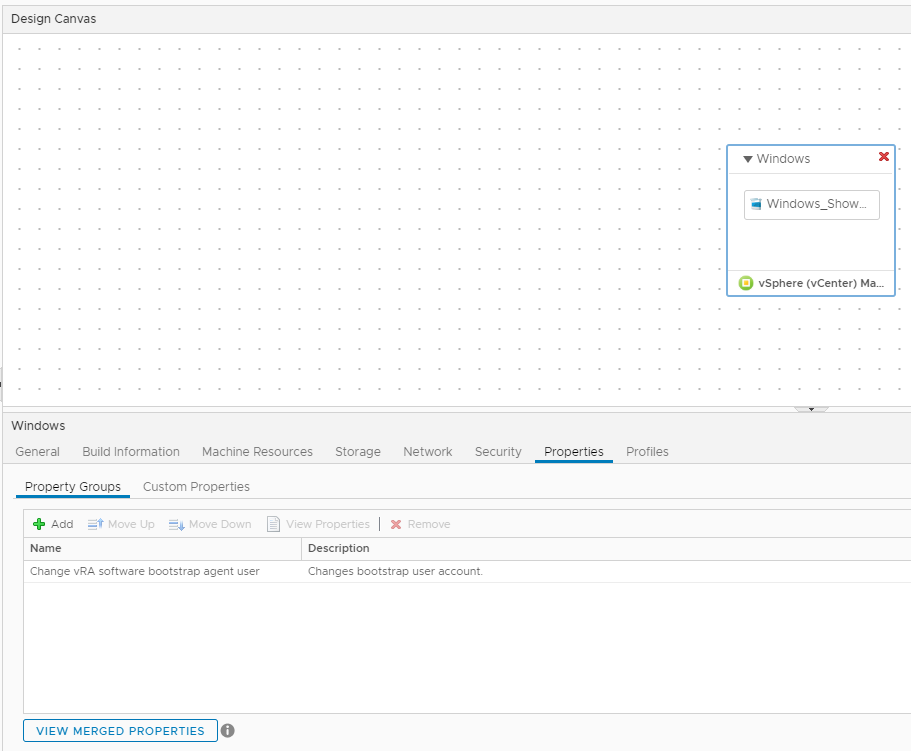
Now that we have this, we can attach the property group to a machine object in our blueprint.
We’re ready to build now. As a last step so I can prove this works, I’ve created a very simple software component that writes out the username of the account running the SC so you can see how the change has worked. It’s a very simple Write-Output statement with the environmental variable holding the user.

Through the magic of modern television, I’ve sped up the process and can show you firsthand how it works. Here’s the result of that SC run on a non-modified deployment versus one where we’ve changed that account.
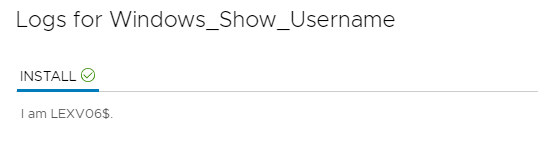
LEXV06 is the name of the computer, and the system account (Local System) takes that name and adds a $ at the end. So this is definitely running the software bootstrap agent as local system. Now how about one that invokes our script?

Let’s check the actual service on the deployed machine.

Boom, there you go. Works as expected.
One final thing before you go. Because we’re changing the user account used to run the software bootstrap agent, this means that workitems and logs that result from a given SC are no longer stored at C:\Windows\Temp but in the $env:TEMP path for that user. This is by default located at C:\Users<user>\AppData\Local\Temp in case you want to find those files.
And that’s it, folks. It’s a neat little trick that can really help out in cases where you need to invoke certain SCs as a specific domain account. And if you ever need to make this decision on a very granular, dynamic basis, you could even use the SovLabs Property Toolkit to make logic that assigns this property group based on a variety of inputs all super simple.
Go check out the code for yourself on my GitHub repo and let me know if you have any questions or comments. Of course, any pull requests would be most welcome!