Deploying VMware Agents with Ansible

Although there are numerous deployment and config management tools out there, none have had as much traction and continued success as Ansible. Purchased by Red Hat in October 2015, Ansible continues to gain steam in every corner. One of the great things about it and keys to its success is its agentless design. Rather that installing and maintaining a persistent agent inside your managed node, Ansible uses SSH/WinRM to conduct its operations. Not only is this a great boon for ops people, but it opens up huge doors to automating many more things than just Linux or Windows servers. Almost anything that has a built-in SSH server can be automated with Ansible, quickly, and securely.
I’ve become very interested in this powerful tool and set out to bring new content to the marketplace (and, in so doing, further my own education), so today I’m happy to report on the availability of some new Ansible roles that will help you in your job—regardless of whether you’re ops, dev, or working in devops—to deploy some common VMware agents with Ansible. Specifically, I’ve written some new roles that deploy and configure two agents for the VMware vRealize family of products: vRealize Log Insight and vRealize Operations Manager. Let me take you through one of these roles to show how easy it can be to deploy them through Ansible. Once you get the hang of that, you’ll know how to repeat it for other roles and not just my own.
To begin with, we need an Ansible control box set up and functional. There are numerous guides out there which can help, so I’ll just assume you’ve got that covered. Your ansible.cfg and inventory files must also be configured and ready to go. Ensure you can perform an ansible <host_or_host_group_pattern> -m ping successfully. From there, we need to download the role from Ansible Galaxy. Navigate to https://galaxy.ansible.com/chipzoller/vmware_loginsight and the installation command is already built for you.
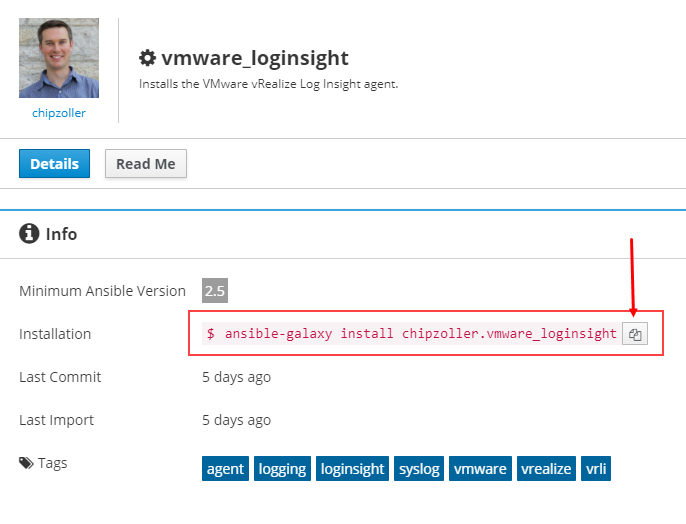
This is pulled in from my GitHub repos into Galaxy, and from Galaxy pulled down to your Ansible control machine. Click the copy button to copy the command string, and paste into your terminal session.
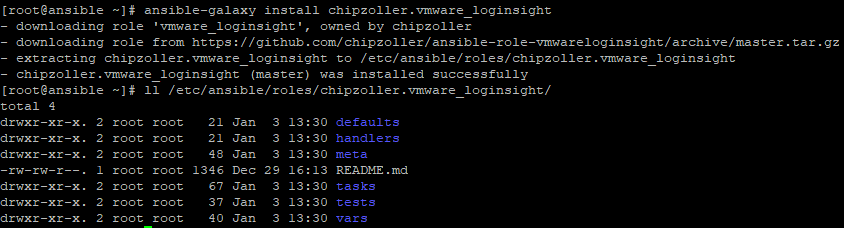
As you can see, we have downloaded the role to the default configured location set by our configuration file (/etc/ansible/roles).
Before starting to configure anything, flip back over to the Read Me page over at the Galaxy hub. You should always read the Details and Read Me portions of these roles to ensure you know what needs to be configured, what’s supported, and other caveats. In the case of the vRealize Log Insight agent, we have to ensure the prereqs are met and the necessary variables are accurate. With that understood, open up and edit the file at defaults/main.yml.
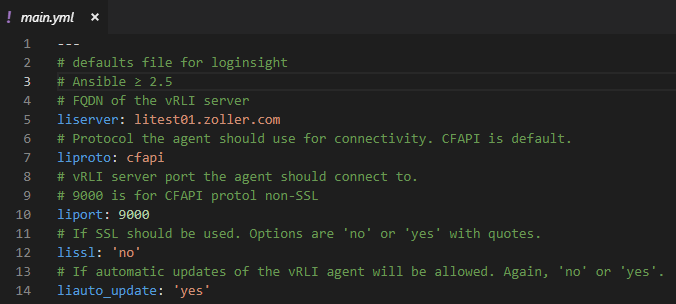
The biggest one to change is the liserver variable. This needs to be the FQDN of your Log Insight node or ILB if using a cluster. For the other variables, you can leave these at their defaults or change them if you know what you’re doing (and understand the available options).
Once the variables are set, we can write a playbook that incorporates this role. Let’s create a very simple one which only calls this role. From my home directory, I’ll vim vrli-role-test.yml and populate it with the following content.

All YML files in Ansible get compiled at runtime and should begin with three dashes (-). The next line assigns a name to this playbook. hosts names the host group or individual host present in your inventory file on which to run this playbook.
TIP: If you’re unsure that Ansible is picking up your inventory, check with ansible-inventory --graph.
Finally, we must specify the role to use. I’ve listed it here on a new line, indented from its parent keyword of roles, and begun with a single dash which indicates a list in YML format. Any other roles you wanted to add to this playbook should be formatted and indented similarly.
Right, now with that saved, let’s verify that we didn’t make any syntax errors. Check it with ansible-playbook vrli-role-test.yml --syntax-check and ensure it comes back clean. If all is well, it should simply return “playbook: vrli-role-test.yml” meaning it’s a valid playbook.
Now let’s run our new playbook. From your terminal, do ansible-playbook vrli-role-test.yml and hit Enter. Depending on the number of hosts in your inventory, the output will be longer or shorter, but hopefully you’ll see something like this.
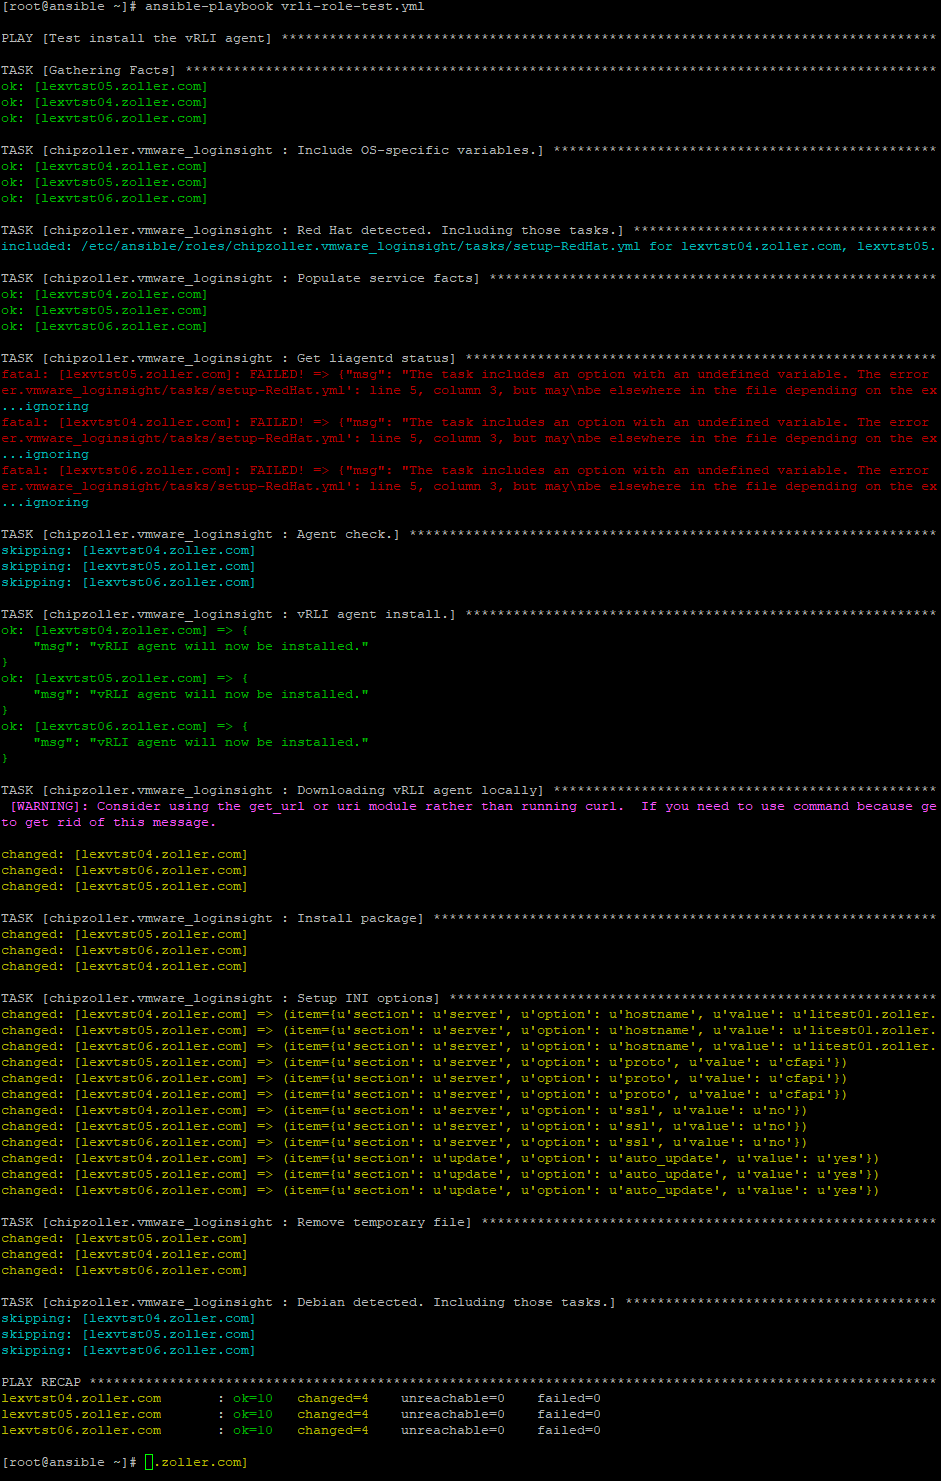
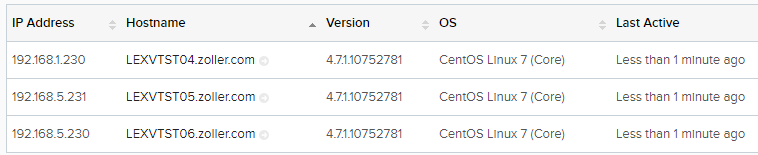
The last line starting with PLAY RECAP is the most important. You should see some OK messages, some changed messages, but no failed ones. Flip over to your Log Insight environment and check Administration => Agents and ensure your nodes are now reporting in.
If so, then congratulations, you just used several key Ansible components to download a pre-built role and plumb it up to your very own playbook!
Now you should be comfortable with using Galaxy to further extend your Ansible capabilities. All that’s left is for you go forward and automate with your new skills.
If you like these roles (or even if you don’t), feel free to drop me a line on my GitHub page at https://github.com/chipzoller.