Drop-Down Lists in vRealize Automation, from Static to Dynamic to External

Overview
Today, I wanted to spend some time returning to a basic principle of vRealize Automation (vRA) which is central to creating customized request forms and limiting blueprint sprawl. This is also a subject which is often requested from users. Unfortunately, those unfamiliar with vRA often think this type of customization requires other forms of complex, expensive integrations or even worse, long professional services engagements. Specifically what I’m talking about is the ability to generate drop-down lists when requesting a catalog item, as well as make those drop-downs dynamic in nature. In this article, I will provide a basic overview of how these work, why they’re useful, and how you can easily create these drop-down menus yourself.
Within vRA, the ability to customize the look and operation of request forms is paramount to its success as a Cloud Management Platform (CMP). When “doing cloud,” some customers have basic needs while others are extremely complex. This wild difference in utilization requires a CMP that is flexible and can be easily extended. One of the most basic ways to provide such an extension is to allow users some form of choice during their request, and the most common way of providing that choice is through a drop-down menu which offers different options.

Suppose you wanted to provide your users a choice at request time allowing them to select an application to provision. While you could certainly hard-code this information in your blueprint, you would be required to offer every choice in a separate blueprint. Based on what you see here, that would be nine separate blueprints. The alternative is to create one blueprint and allow nine possible selections through a drop-down menu. If you’re reading this, you probably agree that one blueprint is simpler.
This all is good, but how is it possible to create these lists? I’m glad to show you how!
One of the core tenets of vRealize Automation is its extensibility and furthermore its flexibility. An often-overlooked mechanism central to enabling this is known as custom properties. These properties are key-value pairs that can be attached all throughout vRA and provide a rich metadata engine which can then be used to either label things, or to make active decisions based on them. For information on the out-of-the-box, supported custom properties, refer to the official reference guide here (PDF).
Referring back to my previous screenshot that showed applications as an example, I might have a custom property named CZ.Application whose value might equal Apache when I select “Apache” from the drop-down list. When the catalog request is selected, which is ultimately a vRA blueprint, this input form would be presented to the end user. When Apache was selected and the form was submitted, the result would look like CZ.Application = Apache. This metadata then follows the deployment through the various pipes within vRA and vRealize Orchestrator (vRO). As it is passed from one internal system to the next, each process can see this key-value pair that has been assigned. Since vRA is machine lifecycle aware (thanks largely to the Event Broker), we can automatically perform actions based on the custom properties’ presence and/or value tied to specific lifecycle states. For example, you might want to land virtual machines that get Apache installed on them in a different cluster than those which get installed with SQL. Since Apache and SQL are different values for the CZ.Application key, it would then be possible to perform different operations based upon each one.
Let’s begin by looking at the simplest form of drop-downs and how to create them.
Lesson 1: Static Values
In order to create the most common type of drop-down, which is a static list, we must create a new custom property. From the vRA console, navigate to Administration -> Property Dictionary -> Property Definitions. Click the green plus symbol to create a new custom property.
The name is, you guessed it, the name of the custom property. This is the key portion of the key-value pair.
The label is a user-friendly word or phrase only users will see in the request form—it has no actual value otherwise.
Text populated in the Description field will appear as a tooltip if a user hovers over an icon to the right of the field in the request form. This is useful to give them some direction so they know what to select.
Visibility describes which tenant has access to this custom property, and that can either be all tenants or just this one.
The display order decides how this custom property should show up (if you decide it should in the first place) on the request form.
Data type is what type of values are eligible to be included. I’m only going to be covering the most common type in this article: string.
Required means the field must have a value in order to allow the request to be submitted.
And the display is how this gets visualized on the request form. This article is specifically about dropdowns, so select that from the list (which is, of course, a drop-down).
Values allow us to statically define each and every value (the value part of the key-value pair this time) manually, or to get them from another source. For now, go with static list. We’ll come back here later.
And in the list itself, you can begin to define those values. The name is what users will see in the request form, and the value is what will become the value of the custom property name.
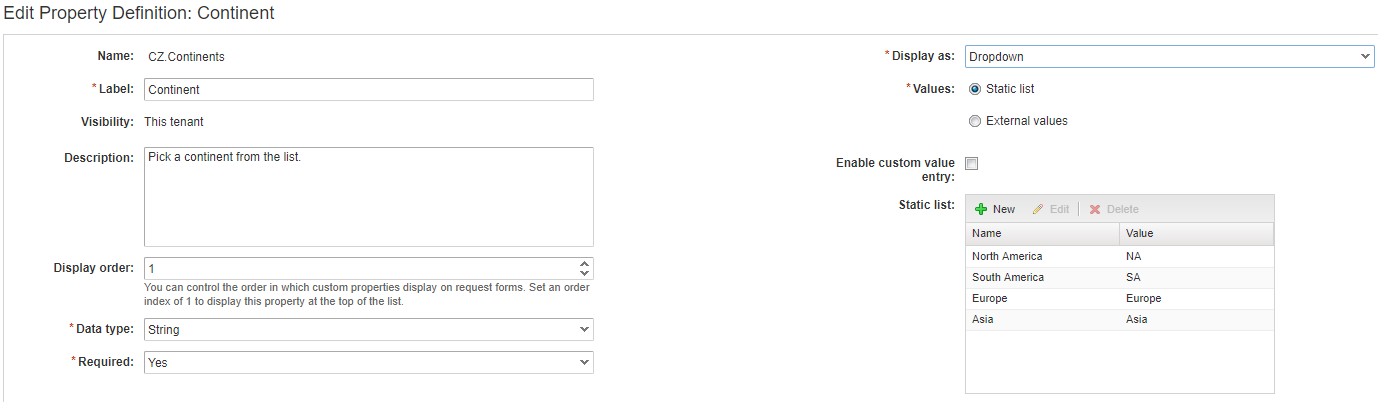
For example, I’ve created one we’ll build upon in this article called CZ.Continents. The list contains four static entries. A user will see “North America” in the drop-down list and, if selected, the value will be set to NA. When the user then submits the request, the key-value of CZ.Continents will equal NA and follow the request through the vRA system.
Once this custom property is saved, you will have a new definition in the dictionary. Let’s go and now attach this custom property to a blueprint to see its effect.

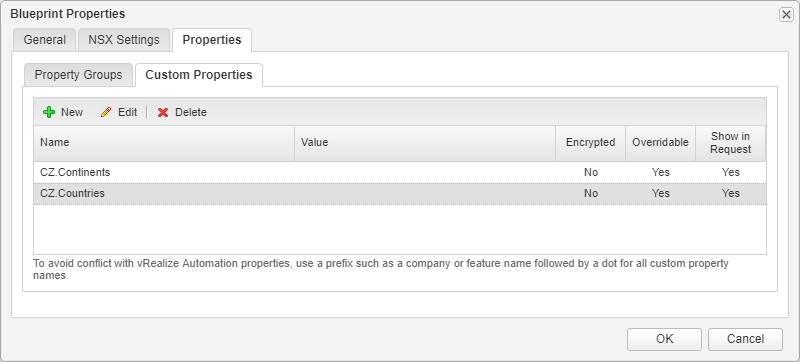
Click the gear icon when in the blueprint canvas editor to bring up the properties menu for the blueprint itself.
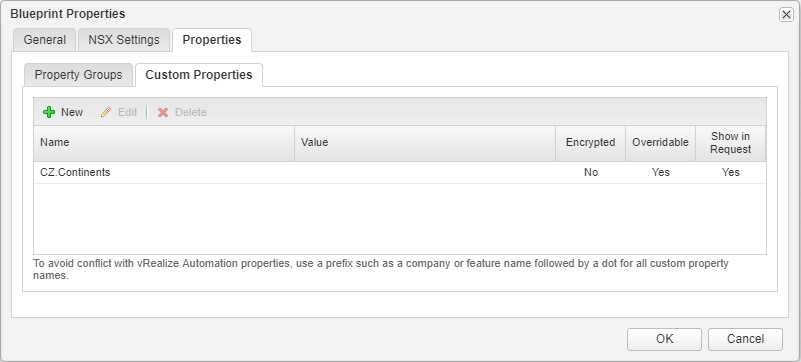
Navigate to the Properties tab at the top, and then the Custom Properties sub-tab on the bottom. Add a new property and find yours in the list. Make sure to check the box “Show in Request” so it is visible on the request form. Click OK -> OK -> Finish to save the updates to your blueprint and go to the catalog to see how your request looks.
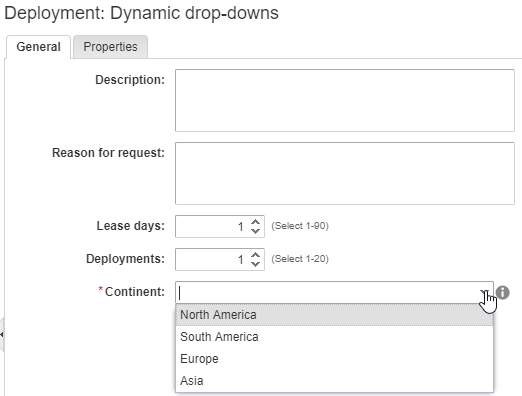
Congratulations! You’ve just created your first drop-down selection list!
Static drop-downs are nice in that they’re suitable for smaller, simpler selection lists. They can be maintained within vRA, and are reusable in a custom property. However, some of the detractions are that they must be statically maintained and cannot be actioned upon when chained together so that the value of one influences the display of another drop-down. This is when dynamic drop-downs come into play, as well as a huge misunderstanding regarding the product. Let me say that more plainly: To create dynamic drop-down lists, you do not need another third-party product!
And for those familiar with SovLabs' Property Toolkit, this functionality may seem similar but they are actually quite different and achieve different effects. While dynamic drop-downs provide options to end-users at request time that still require explicit selection, Property Toolkit predetermines that choice in the background, removing the need for users to make any selection at all. Through abilities such as property synthesis and dynamic property sets, the Property Toolkit allows custom properties to be set in an automated and templated fashion that does not rely upon drop-down lists.
Now that some of the confusion has been put to rest, let’s explain dynamic drop-downs a little better building upon our previous example of Continents.
Lesson 2: Dynamic Values
Assume you wanted multiple selection lists in a single blueprint. Each custom property is capable of storing its own list of static values, but they aren’t aware of what was selected in them. So although I might have a field called “Continents” I may need a second one called “Countries” which list the countries based on the prior selection. For example, if I selected North America from the list of Continents, I would expect to only see a filtered list of countries in the following selection list. It would be fairly useless if I was able to select a country outside of North America. This is what we mean by dynamic drop-downs: The presentation of values in a subsequent list is influenced by the selection of an earlier value and so on. This is where we have to involve vRealize Orchestrator (vRO) because vRA and more specifically, simple static lists are not capable of performing logic. That logic is in the form of “if this then these” in the case of multiple options or “if this then this” in the case of just a single one. By using vRO, which comes baked into vRA and which you own as a part of it, we can craft “Actions.” Actions are reusable scripting components in vRO that are able to understand this flow of logic and respond programmatically.
An Action is nothing more than a script (written in JavaScript) which takes some inputs, transforms them based on the code you write, and then returns an output. The input can and very probably is the value of a prior selection you made, and the output can be a list of things that are only based on that input. In so doing, we can present dynamic lists of values. Let us go through the process of creating and then consuming these Actions.
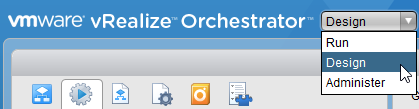
For access to Actions, we need access to vRO. I’m assuming in this article you are at least familiar with vRO, have permissions to login to it, and know how and where to login. If this isn’t information you know at this point, please see the relevant vRealize Automation documentation for your version. Once logged in using the vRO client, enter into Design mode from the drop-down list to the right of the logo.
Click on the 
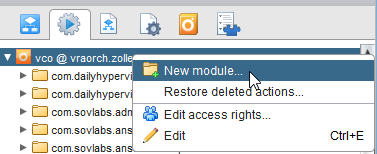
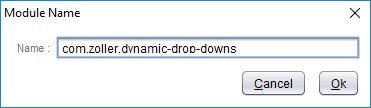
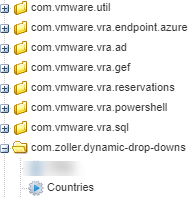
Modules are commonly named in reverse DNS format, likely as vestiges of the earliest ties to Java in which this was a common practice. We’ll follow suit and name ours similarly.
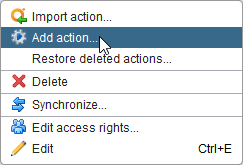
Now that we have our module, we can begin to create Actions. Right-click on your module (folder) and select Add action. Give it a name. I’ll call this one “Countries”.
Click the pencil icon to edit your new Action. Flip over to the Scripting tab. This is where the magic happens!
The Scripting tab contains information the Action needs to perform its decision-making process. It does this by taking an input, doing something with that input, and then giving you an output in return. There are three steps we must complete in order to properly build this action so we can then consume it in vRA. See the screenshot below for an example of the Scripting tab and the steps we’ll outline going from top to bottom.
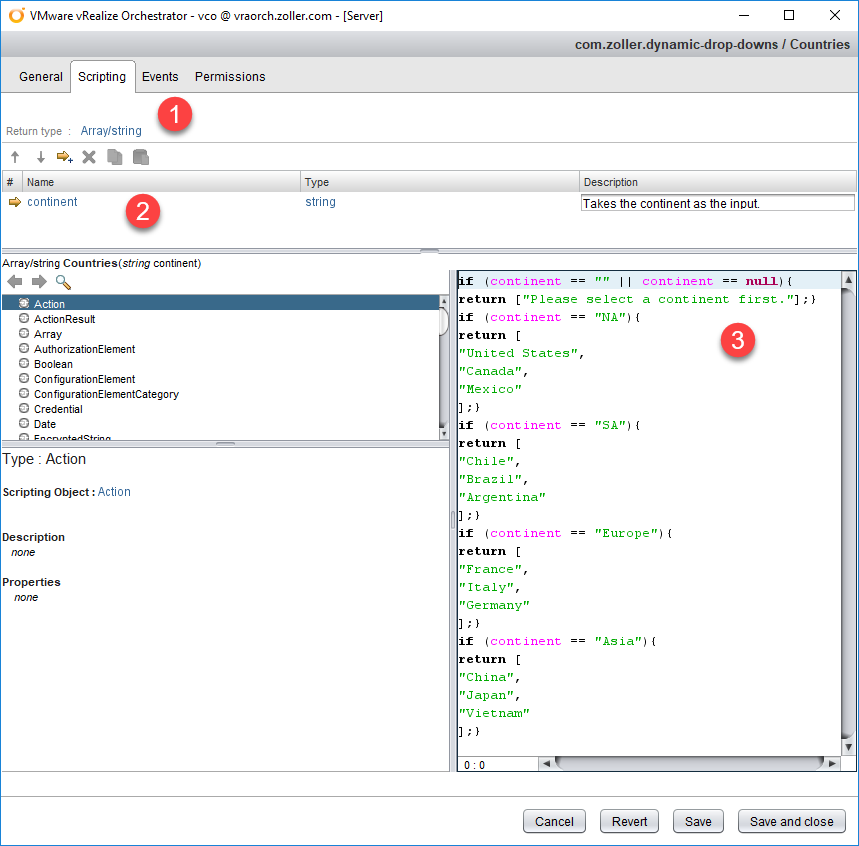
First, we must define the return type. The return type is the type of output we are telling the Action it must provide. There are all different types within vRO, so don’t get overwhelmed when you see the list. The one we’ll be dealing with is Array/string. This is essentially a list of different strings, because we in turn have to populate a drop-down box—a list, that is.
Second, we have to give it an input. After all, we can’t do work if we’re not told what to work “on”. Click the right arrow icon to add an input. Call it what you like, but make it a type of string. In my example, since we plan to deliver back a list of cities, we have to take in the name of a continent. Make sense?
And finally, we have to tell the Action what it needs to do and then hand back. In my screenshot, I’ve deliberately expanded this text so it’s friendlier on novice eyes and easier to read and decipher. And not to worry, I’m not expecting you to type all of this out. I’m not even asking you to copy and paste. At the end of the article, you’ll get all the actions you see here so you may easily import them to quickly get up and running with some dynamic drop-downs in your own vRA environment. That said, here’s the script block if you wish to follow along and try your hand at creating an Action.
 1if (continent == "" || continent == null){
 2  return [
 3    "Please select a continent first."
 4  ];}
 5if (continent == "NA"){
 6  return [
 7    "United States",
 8    "Canada",
 9    "Mexico"
10  ];}
11if (continent == "SA"){
12  return [
13    "Chile",
14    "Brazil",
15    "Argentina"
16  ];}
17if (continent == "Europe"){
18  return [
19    "France",
20    "Italy",
21    "Germany"
22  ];}
23if (continent == "Asia"){
24  return [
25    "China",
26    "Japan",
27    "Vietnam"
28  ];}
The logic is pretty simple. In human readable prose, we’re saying the following:
- If the continent name is blank, let the user know they must select one first.
- If the continent is NA (for North America), return United States, Canada, and Mexico.
- If the continent is SA (for South America), return Chile, Brazil, and Argentina.
- If the continent is Europe, return France, Italy, and Germany.
- If the continent is Asia, return China, Japan, and Vietnam.
So in each case, the input is the name of the continent, and the output is a list of three different strings, hence the need for an array of strings back in step number one.
Once you’re satisfied that all is well, Save and Close this Action. If you’ve made any errors that render this script unparseable, vRO should let you know so you can go back and fix it. With that done, let’s now turn over to vRA and add this Action to a new custom property for Countries that generates our list dynamically rather than from a static list of values.
Create a new custom property just like we did with CZ.Continents. Everything can be the same except for one important selection. For Values, choose the radio button for External values as opposed to Static list.

When you make this change, you’ll see two new portions revealed: Script action and Input parameters. Click the Change button under Script action which will bring up a window that shows all available modules from vRO and the eligible Actions within them. You should be able to locate the new Action you created.
If you do not see your new Action, edit it inside the vRO client and ensure you set the return type as Array/string. vRA filters all Actions within vRO to only display those that return types which are compatible with a custom property definition, and if the return type isn’t compatible it will be absent.
Click OK once you’ve found and selected your action to be brought back to the custom property definition. When you’re there, you’ll now notice it has pulled in your input. Highlight this input, click the Edit button, and check the Bind box. With a binding, we are telling the input to grab the value from another custom property. This is how we tie (or bind) two or more custom properties together where the value of one feeds the input of another.
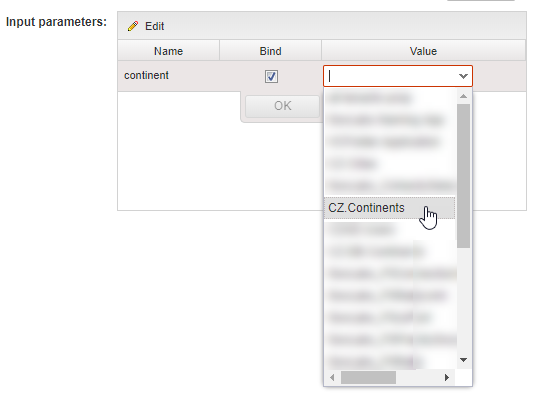
Select your custom property for Continents, click OK, then click OK to save your new custom property definition. Once that’s done and you have your new Countries custom property, go back to your blueprint and add this one to the existing one for Continents. Remember to show it in request. Mine now looks like this.
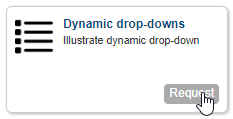
From here, let’s go back and request this catalog item to see how it works!
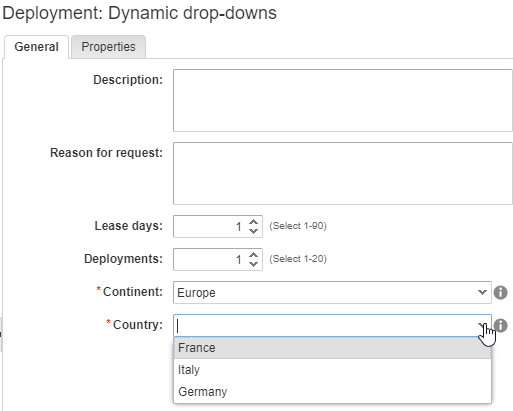
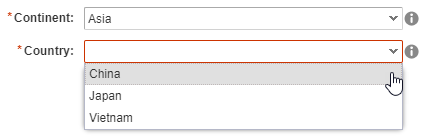
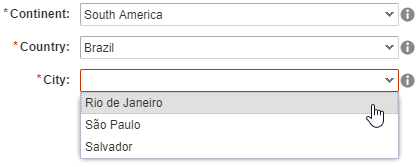
Cool! So we now have two drop-down lists in the request form, each one originating from a different custom property. The Continent property is, if you remember, a static list of values we defined while the new Country property is a dynamic one being executed as a vRO Action. When I selected “Europe” for the Continent field, I am only presented with the three options that pertain to Europe and nothing else. If I change that value to “Asia” that list filters out countries only in Asia. Pretty slick, isn’t it?!
Now that we have two custom properties supplying drop-down menus with one being static and another being dynamic, let’s chain one more dynamic drop-down to this form to filter out at an even more granular level. Create a new one called “Cities” that connects to Countries and dynamically presents the cities for a given country. I won’t give away all the answers this time except for the code you can use to practice. If you’d like to skip the lesson, the Action has been pre-built for you and is available as a download at the end of this article. The order is:
- Create new vRO action.
- Create new custom property consuming new vRO Action.
- Bind the input to Countries.
- Add custom property to blueprint and show in request.
- Provision.
If you’d like to make your own JavaScript from Countries to re-use in Cities, feel free. Otherwise, I’ll provide a block for you here.
 1if (country == "" || country == null){
 2  return ["Please select a country first."];}
 3//North America
 4if (country == "United States"){
 5  return ["New York","Atlanta","Chicago"
 6  ];}
 7if (country == "Canada"){
 8  return ["Toronto","Ottowa","Montreal"
 9  ];}
10if (country == "Mexico"){
11  return ["Mexico City","Monterrey","Tijuana"
12  ];}
13//South America
14if (country == "Chile"){
15  return ["Santiago","Valdivia","Pucón"
16  ];}
17if (country == "Brazil"){
18  return ["Rio de Janeiro","São Paulo","Salvador"
19  ];}
20if (country == "Argentina"){
21  return ["Buenos Aires","Córdoba","Rosario"
22  ];}
23//Europe
24if (country == "France"){
25  return ["Paris","Lyon","Nice"
26  ];}
27if (country == "Italy"){
28  return ["Rome","Venice","Milan"
29  ];}
30if (country == "Germany"){
31  return ["Berlin","Munich","Hamburg"
32  ];}
33//Asia
34if (country == "China"){
35  return ["Shanghai","Beijing","Tianjin"
36  ];}
37if (country == "Japan"){
38  return ["Tokyo","Osaka","Yokohama"
39  ];}
40if (country == "Vietnam"){
41  return ["Ho Chi Minh City","Hanoi","Da Nang"
42  ];}
Take a few minutes now to go through the steps we outlined earlier and create the various objects within vRA and vRO and connect the pieces in your blueprint.
If you’re done, hopefully you’ve checked your request form and it looks something like this.
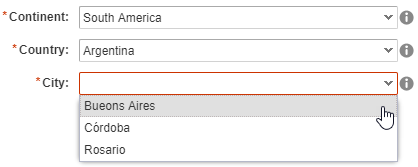
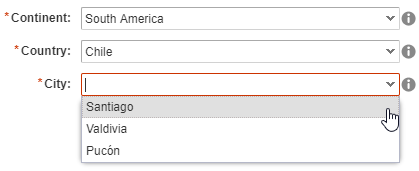
If you got this result, a hearty congratulations! You now should have the hang of static lists within custom properties as well as using vRO Actions to create fully dynamic drop-downs. But there’s still one more twist I want to throw in here. While these static and dynamic drop-downs create lots of flexibility in your request forms and reusability in your blueprints, sometimes it isn’t possible to record these values either in vRA or in vRO. In many cases, you might already have a source for these lists and need to present that list as-is in vRealize Automation. This is especially true if the list resides in a secondary system of record such as a database where other applications and processes must have access to insert, update, and delete data directly. It is still possible to use these external sources to provide the data for a drop-down, and this is the third and final use case I want to show for drop-downs: harvesting content from a database.
Lesson 3: External Values
In the case of a database, you have data that resides within a table that you wish to pull out and present as your dynamic list. When new data is entered, updated, or deleted, no changes are necessary in either vRA or vRO because the source of truth lies external to both of those systems. I’ll illustrate how you can easily connect the plumbing, similar to the second lesson on dynamic drop-downs, but this time to an external Microsoft SQL Database instead!
To start, ensure you have an existing MS SQL database to work with and have sufficient credentials and network connectivity from vRO to connect to it. You will also need to know the table and column from which you want the data pulled. With those things in hand, return to the vRO client.
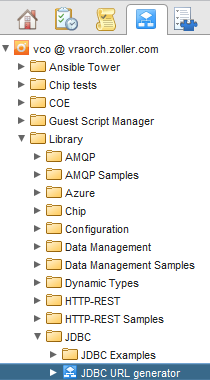
From the Run menu, access the Workflows inventory tree, and browse to Library -> JDBC -> JDBC URL generator.
In order to connect to that SQL database, we need to get a proper URL that has all the various pieces and parts to direct communication to the right server, instance, and database. We will reuse the URL in the next step. Run the JDBC URL generator workflow.
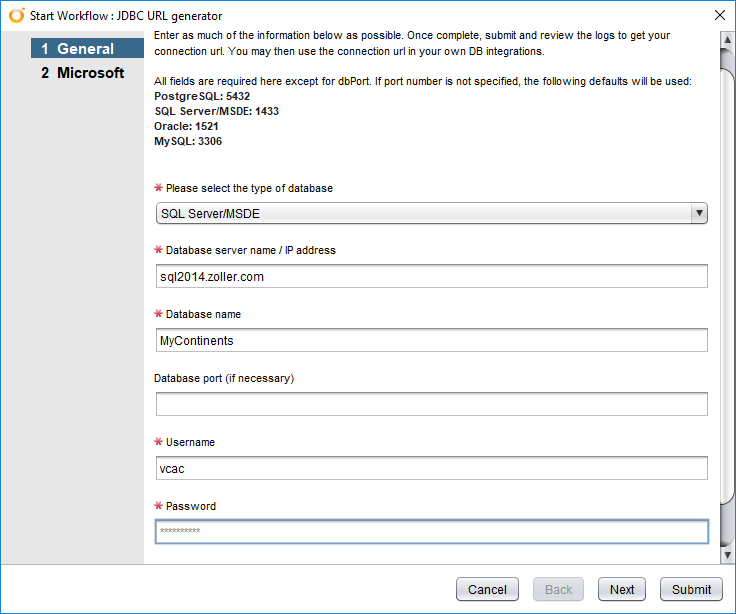
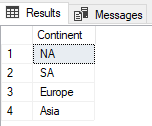
In the first step, we need to fill out the form with the type of database (SQL Server/MSDE for Microsoft’s), the hostname where the database is run, the name of the actual database, and credentials to connect. In this lesson, I’ve created a very basic SQL database called “MyContinents” with a single table containing, yep, a list of continents.
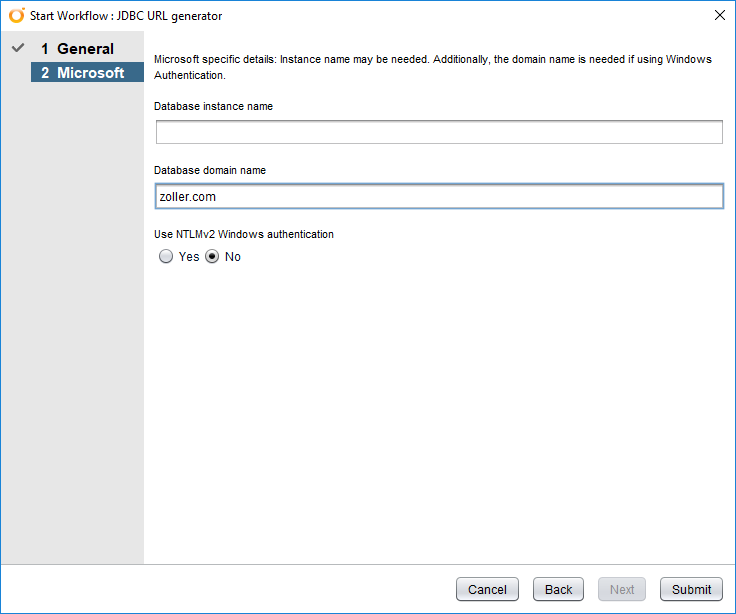
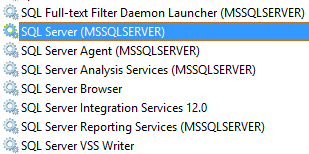
On the second and final step, provide the database instance name if it’s something other than the default of MSSQLSERVER, and the domain of the user supplied earlier. If you do not know the instance name of your SQL server, you can find this, among other places, in the list of Windows services.
Once you submit the workflow and it succeeds (if it did not, go back and check the values you provided), check the Logs tab of the completed workflow. The message shown contains the URL we will use in just a second.
1[2018-05-10 20:38:56.622] [I] Connection String: jdbc:jtds:sqlserver://sql2014.zoller.com:1433/MyContinents;domain=zoller.com
2[2018-05-10 20:38:56.668] [I] Connection to database successful
In this case, the connection URL we want to copy is the part beginning with jdbc:jtds:sqlserver://. Everything you see highlighted above, copy for use in the next workflow. We can also see the test connection was successful.
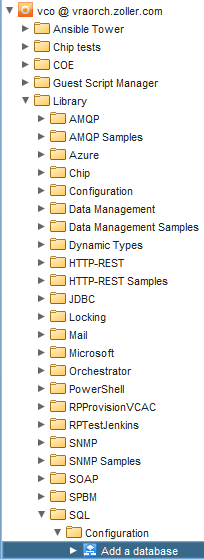
With this JDBC URL in hand, navigate to Library -> SQL -> Configuration -> Add a database.
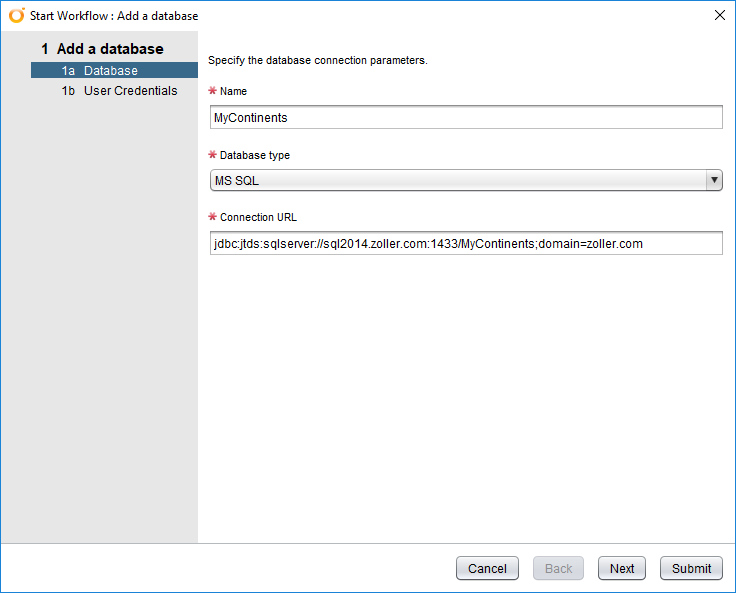
Run the workflow. For the name, it’s best to call it the same name as the database to which you’re connecting. Select MS SQL for the type, and paste in that JDBC URL you received in the last workflow.
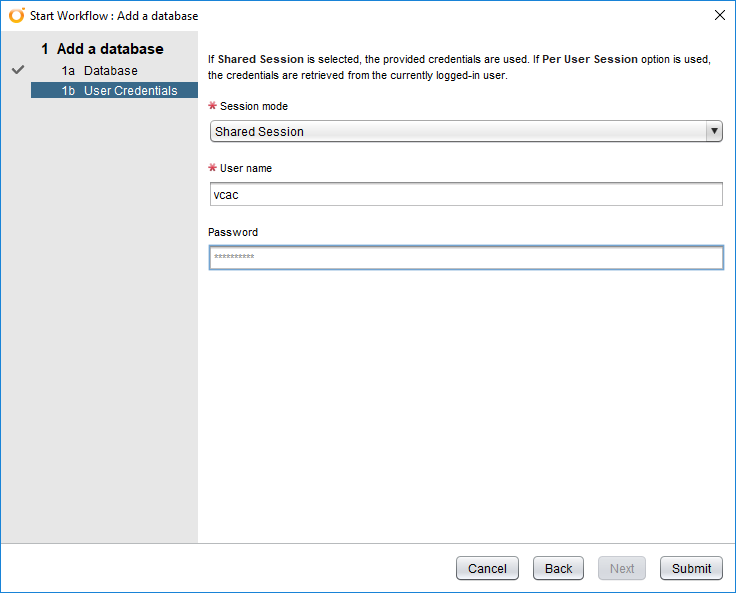
Click Next and leave Shared Session the default while entering the username (without domain information) and password. A Shared Session will ensure that the query is always executed with the same credentials no matter who is pushing buttons inside the vRA portal.
Click Submit and watch it go. When it completes successfully, flip over in your vRO client to the Inventory tab. Find and expand SQL Plug-in, and make sure you can see your newly-added database and any tables and columns.
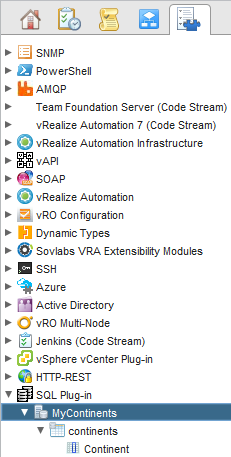
Again, mine is very simple for illustration purposes, so I have but a single table with a single column. Ultimately we only need these three things to start pulling data.
Once you’re satisfied with your database configuration, it’s time to create the new Action. This one will have three inputs because we want to be able to supply database, table, and column all from within vRA without having to manually update JavaScript. This makes the Action extremely simple to connect and very quick to update if we later wanted to connect to a different database. The JavaScript is a little more complex here, so I’ll save you the trouble in attempting to figure it out. Simply copy-and-paste from the code block below or, better still, download the Action I’ve pre-built for you.
Here’s the code we’ll use to pull in values from a specified column within a table. Comments, denoted by double forward slashes (/) are generously placed so it’s easy for you to identify exactly what the following code attempts to do.
 1//Find the name of the database from inputDB and convert it to a SQL:Database type.
 2var databases = SQLDatabaseManager.getDatabases();
 3var database = null;
 4for each (var thisdb in databases) {
 5   if (thisdb.name == inputDB) {
 6  database = thisdb;
 7  break;
 8  }
 9}
10//Build the SQL query statement which searches the input database within the specified table and returns results from only the inputColumn name.
11var query = "";
12query += "SELECT ";
13query += inputColumn;
14query += " FROM ";
15query += inputDB;
16query += ".dbo.";
17query += inputTable;
18//Execute the query, then store the results in an array. Return the array at the very end.
19var list = thisdb.readCustomQuery(query)
20var results = new Array ();
21var d, i;
22for (i = 0; i < list.length; i++) {
23  d = list[i][inputColumn];
24  results.push(d);
25  }
26return results
Now we can head into vRA and create a new custom property that calls this Action. Since my database is called MyContinents, and contains the same list of continents that was stored in the static list, let’s swap out that static list custom property for this one that pulls from an external SQL database.
From the Property Definitions section, I’ll create a new one called CZ.DB.Continents which uses this action. Because we defined three inputs on the Action, we must supply three values for those inputs here.
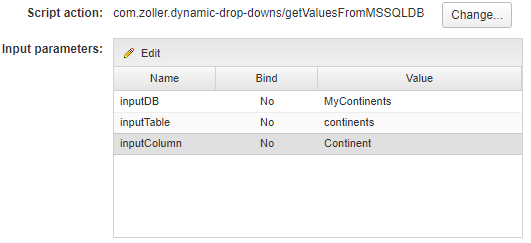
Note that we do not bind these inputs because we’re telling it directly which database, table, and column to use. From there, the Action knows what to fetch and return.
With this complete, there is one last step and that is to swap out the custom property binding of our Countries property so it keys off this new custom property and not the first one we created with static values. Edit your Countries property now to update the binding. Don’t forget to edit your blueprint to remove the static list of Continents and supply this new custom property that pulls them from the database.
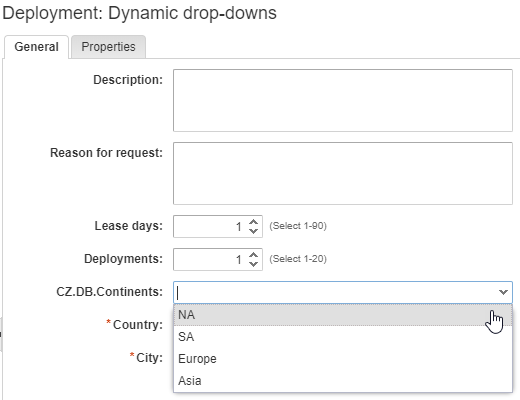
If you go back to your request form, you should now see that your Continents custom property is pulling in those names directly from your external SQL database.
Very cool, indeed! You’ll also find that if you updated your bindings, your cascading properties with dynamic drop-downs continue to work as before. The best part about this Action is it is super simple to either reconfigure your existing custom property to point to a new column, table, and database; but it’s just as easy to create a new custom property and supply different values—all while not needing to return to vRO to manipulate code.
Conclusion
During the course of this tutorial, I’ve introduced custom properties and briefly explained their function. We then took a look at a simple custom property which statically defines its values in a list and showed how that list can be leveraged at request time. From there, we discussed vRealize Orchestrator in the context of Actions and how, through scriptable tasks, they can dynamically supply values of further drop-down selection lists. Finally, I illustrated how it is possible to pull those reference values into a drop-down list from an external data source, specifically a Microsoft SQL database.
I hope this has been a helpful and, above all, informative article that helps you grasp the concept of drop-down lists in vRA. Furthermore I hope this arms you with some good tools (Actions) you can download and put to work in your own environment, instantly delivering value! If you did not enjoy this, maybe keep that to yourself. (Only kidding, of course.) Either way, I’d love to hear your feedback whether that’s positive or negative, so feel free to reach out to me on Twitter (@chipzoller). Good luck making your CMP more valuable, feature-rich, and flexible.
P.S. – For a vRO Package containing all three Actions covered in this tutorial, download it from VMware {code} here. If you’d like a quick article illustrating how to import a vRO package, see this blog. If you’re only interested in the Action illustrated in Lesson 3, see this page.