New disk-related features in vSphere 6

vSphere 6 launched in March of 2015, and since then there have been numerous blogs, presentations, videos, and discussions around the myriad new major features. These are all great improvements to an already solid platform, but there are also lots of un- or minimally-documented features which should be mentioned, features which make administrators’ and engineers’ lives easier. I’ll cover just three of them here, and they all are related to disk devices. And by the way, just like all new features introduced since 5.1, these new features are only available in the vSphere web client.
1. USB boot devices are visible as a disk device.
Have there ever been times when you looked at one of your hosts, or a customer’s host, and wondered where ESXi was actually booting? Was it a SAN LUN? Was it a local hard drive? Was it a USB stick? Well, in the case of a flash device such as a USB stick, block devices used as boot devices were filtered from the disk devices view on a host. In vSphere 6, however, your USB boot devices show up as a disk device, so you can easily tell if there is such a device inserted and if it’s booting from it.
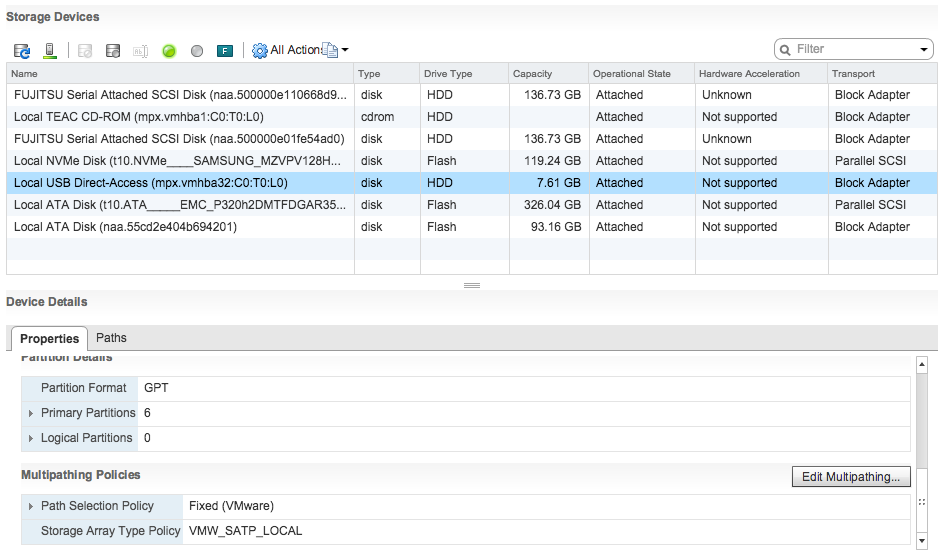
This was the question that I faced last week in my lab, and while I could have run some ESXi shell commands to figure out the answer, I ended up cracking open a server to tell what I had in there. As you can see from the above example, I have a USB stick that is 8GB in size attached to this host. If I scroll down in the Properties pane, I can see more information about this disk device, including the Primary Partitions information.
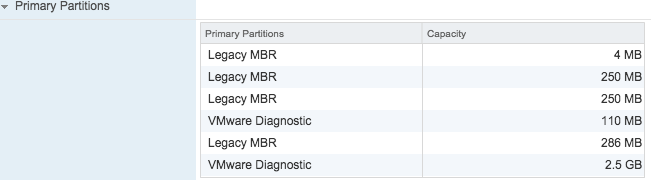
Here we can see the various partitions that are automatically created when ESXi gets installed. This is admittedly a minor feature, but still a convenient one that was not possible in vSphere 5.5.
2. Ability to clear partitions from an imported disk.
Here’s an interesting little gem which makes clearing a partition table from an imported disk a little more accessible. In the past, let’s say you wanted to repurpose an old hard drive from a Windows system into an ESXi host. You inserted the disk into your host, booted it up, saw that device available, and wanted to turn it into a VMFS datastore for one of multiple reasons. You walked through the creation wizard until the very end step when it creates the VMFS partition structure, and then you encountered an error such as:
1Error:A specified parameter was not correct.
2Vim.Host.DiskPartitionInfo.spec
3Error Stack
4Call "HostStorageSystem.ComputeDiskPartitionInfo" for object "storageSystem"
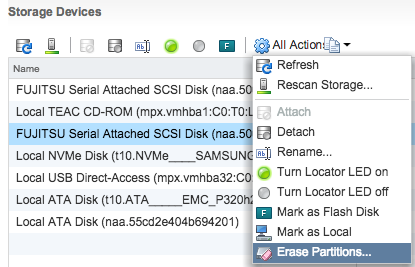
You might have tracked it back to a couple of KB articles which instructed you to drop down to an ESXi shell or SSH session and use partedUtil to view and ultimately clear the existing partition information. This was fine, and did work, it just took a few commands to fix everything up. Starting in vSphere 6.0 Update 1, in the web client you can now do this directly on a disk device by selecting it, clicking the “All Actions” menu, and clicking the Erase Partitions option.
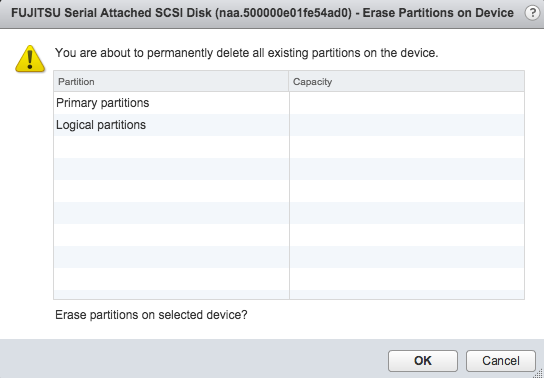
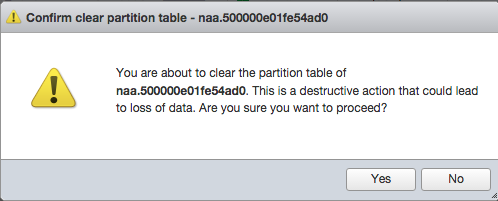
In the resulting window, it’ll ask if you truly want to clear all those existing partitions. Select OK and it’ll do its thing and leave you with a sparkly clean (from a partition perspective, anyway) disk ready for consumption by ESXi in a variety of roles.
Also, if you happen to have checked out the latest ESXi embedded host client fling, this is also possible by going to the Storage pane in the left sidebar, then Devices tab. If you click on a device and click the Actions menu, you have the ability to clear the partition table there.
Once the disk is cleared, you should have no problems using it as a datastore or anything else.
3. Mark disks as either Flash or HDD
For the last little interesting storage nugget, we look at how different disk devices are flagged or presented to ESXi. Now with vSphere 6, you have the ability within the web client to mark either a hard disk as flash or a flash disk as a hard disk.

You can see here that I’ve selected a HDD, one of my Fujitsu SAS disks. Depending on the type of drive detected and visible in the Drive Type column, I can mark this as the opposite type—Flash in this case as shown by the F icon over top. Why would you want to do this? It would mostly be useful if either a disk was not detected correctly, or in cases where you wanted to evaluate VSAN and were using ESXi deployed on a virtual machine and needed to force a disk as a certain type. (VSAN requires at least one flash disk and one hard disk). Prior to this enhancement in vSphere 6, you’d have to run some esxcli commands against the host and disk to make it so, which William Lam has covered in the past here. These would usually be in the form of SATP claim rules that were designed to override the drive type as initially detected. While this is a minor ability, it yet again saves on running commands against the host to accomplish this change.
As mentioned at the outset, these are minor enhancements available in vSphere 6, but they do make performing these tasks simpler and quicker. This newest release brings lots of totally new features and enhancements to existing ones, some of which are on the surface, and some of which are well hidden. Hopefully bringing these few morsels to light helps a few of you in your daily activities!