Using the vRealize Certificate Generation Tool

Most of us have felt the pain in some way of dealing with certificate management in enterprise environments. I suspect for most people, this is one of the least fun tasks in either the virtualization world or IT in general. Let’s face it, it just isn’t something we look forward to doing. Most products out there have a reasonable if not good way of coping with installing, changing, or renewing of certificates. In the VMware space, recently the vSphere 6 release dramatically simplified this process with the Certificate Manager application built into the Platform Services Controller. It made issuing certificates and most of the headaches surrounding it disappear in a multi-component environment. However, for VMware’s other large suite, vRealize, there has yet to be a good way to centrally handle even the generation of certificates for all the various components. You would have to login into every box, run OpenSSL commands, pre-create various file templates, and export your CSR only to come back to each box later. All of this is now made a little easier and more convenient with VMware’s new vRealize Certificate Generation Tool released in March. There don’t seem to be many people who are aware of its existence or at least who have written about it, and this may be due to the fact that it was published in a KB article only. In this blog post, I’ll walk you through the steps necessary to use this tool and generate certificates for all the vRealize Automation components, an example of how most enterprises will actually create the certs, and how they can then be installed in the various VMs in the stack leading up to a successful installation of vRealize Automation 6.2.3.
First, point your browser to the KB article 2107816 and download the attachment listed towards the bottom. When you un-zip it, there will be a shell script called certgen.sh and a PDF with instructions.
Next, decide whether you want to run this from a Mac (if you use one), or from one of the Linux-based appliances. If the latter, you have your choice of the identity appliance, or the front-end appliance, and I recommend the identity appliance. If you wish to use a Mac and you also want to generate the certificates for the vRA Application Services or vRO appliances, you have to follow an additional step. If this doesn’t interest you and you want to use a Mac and only get the certificates for vRealize Automation, skip the next section.
Installing JDK for Mac OS X
Because the certificates for vRA App Services and vRO are Java-based and require the command-line tool called keytool, you will need to first download and install the Java SE Development Kit. You can pick that up here for JDK8.
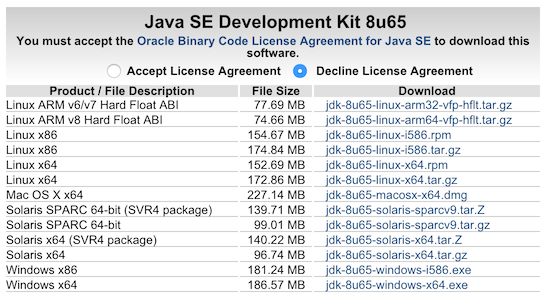
Click the radio button to Accept License Agreement, and download the file jdk-8u65-macosx-x64.dmg. Install the binaries and verify in a terminal session you can run keytool:
 1Key and Certificate Management Tool
 2
 3Commands:
 4
 5 -certreq            Generates a certificate request
 6 -changealias        Changes an entry's alias
 7 -delete             Deletes an entry
 8 -exportcert         Exports certificate
 9 -genkeypair         Generates a key pair
10 -genseckey          Generates a secret key
11 -gencert            Generates certificate from a certificate request
12 -importcert         Imports a certificate or a certificate chain
13 -importpass         Imports a password
14 -importkeystore     Imports one or all entries from another keystore
15 -keypasswd          Changes the key password of an entry
16 -list               Lists entries in a keystore
17 -printcert          Prints the content of a certificate
18 -printcertreq       Prints the content of a certificate request
19 -printcrl           Prints the content of a CRL file
20 -storepasswd        Changes the store password of a keystore
21
22Use "keytool -command_name -help" for usage of command_name
This process was performed on Mac OS 10.10 (Yosemite), so if using an earlier or later version, your experience might be slightly different.
Running the vRealize Certificate Generation Tool
Ok, so you either prepped your Mac for running the tool, decided you weren’t going to bother with certs other than those for vRA proper, or don’t have a Mac and want to run the tool from one of the vRA appliances. If the latter, simply upload certgen.sh to /tmp on the identity appliance since this is generally the first appliance that gets uploaded and configured. Make sure the script has execute permissions for root, and if not run a chmod +x certgen.sh command to ensure you can run it.
Alright, we have all that done? Good. Let’s continue.
I’m going to run this from my Mac, but the steps are the same regardless of where you run the script.
Before you actually run the tool, we need to pre-create a text file called servers.txt in the same directory as the script. Inside this file we will need to create a list of all the components for which a certificate will need to be generated. We will do this using the shortname of the hostname, one per line. Since this is a demo environment, and I’m going to generate a certificate signing request (CSR) for a fully-distributed install, I’m going to put everything inside.
1cat servers.txt
2vrademo
3vrademoid1
4vrademoweb
5vrademoman
Make sure that if you are doing a distributed install, you use the load balancer VIP name for the components that require it, such as what I’ve done above. In this case, the identity appliance is a single instance, hence the number at the end. I have VIPs for the front-end, web, and manager servers. Since I’m not interested in Application Services, vRO, or vROps, I haven’t included those hostnames here, but follow the same formula and put their hostnames/VIP names here in order for the CSR to include them.
When you have created the text file with my hostnames, run the script and begin inputting the information to create the CSR.
 1********************************************************
 2*      VMware vRealize - Signed Certificate Tool       *
 3*            CSE Reference Architecture Team           *
 4********************************************************
 5
 6
 7This script will generate certificate signing requests (CSRs) which can be signed by a Certificate Authority (CA).
 8Once the signed certificates are downloaded to the execution directory of this script this script will output certificates in formats accepted by various VMware products.
 9
10Enter Organization:
11Zoller
12
13Enter Organizational Unit:
14IT
15
16Enter Locality/Town:
17Norcross
18
19Enter State/County:
20Georgia
21
22Enter Country Code (2 lettered ISO code e.g. GB,US,etc):
23US
24
25Found server list file, containing the following names:
26vrademo
27vrademoid1
28vrademoweb
29vrademoman
30
31
32Do you wish to import the servers from this file? (y/n):
You can see it has imported the hostnames as we have entered them. Choose ‘y’ to import those names. It then asks you to insert the domain name which it will append to the shortnames after which it will generate the CSR. Be very certain that you scrutanize the hostnames carefully in the above output. They must be exactly correct before going forward. If there is even one misspelling it could cause you to repeat this process all over again.
Copy the block of text for the CSR making sure to include everything including the -----BEGIN CERTIFICATE REQUEST----- and -----END CERTIFICATE REQUEST----- pieces.
You now have the CSR, so we’ll take this over to our root CA and get it signed.
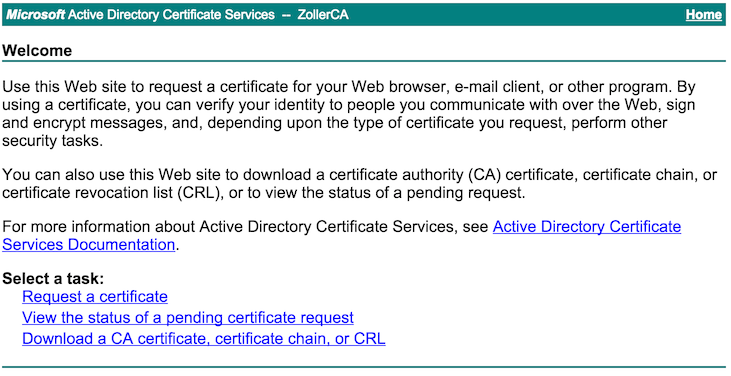
We have to get two different files from this stage, one of which is the root CA certificate encoded in Base64 format and saved as Root64.cer along with the certificate file itself saved as vrealize.crt. These files should be uploaded back to the working directory of the script before continuing. To get the CA cert, I’ll login to my enterprise root CA administration page and click on “Download a CA certificate, certificate chain, or CRL”. In this example, I’m running Windows Server 2012 R2 with the Certificate Management role, so your environment might be different.
Click on the Base64 radio button under Encoding method and then click the link to “Download CA certificate”.
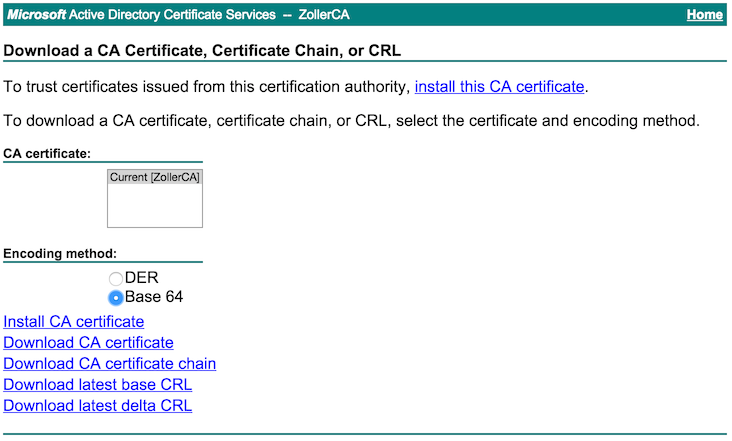
Save as Root64.cer.
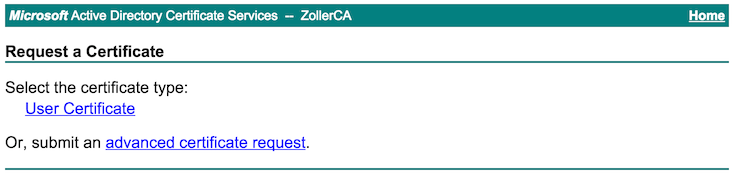
Once we have the Root CA certificate, we need to actually generate the certificate for the components now that we have the CSR. Go back to the homepage and click “Request a certificate”.
We want to submit an “advanced certificate request”.
Since I have already created a certificate signing template on my certificate server, I’ll select that from the list and enter the full CSR text in the box at the top. Click the Submit button.

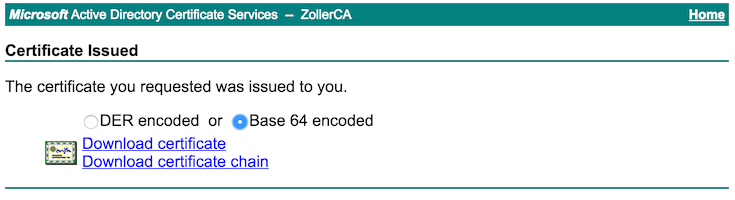
Now that the cert is generated, click the radio button for Base 64 encoded and click the link to download the certificate remembering to save as vrealize.crt. Do not download the entire chain.
Now that we have both of these files in the working directory, we can continue the script.
 1Copy the above Certificate Request, or use the vrealize.csr file in /Users/chipzoller/Downloads/vrealizecerttool,
 2and use it to request a signed certificate from your CA - the certificate must be Base64 encoded,
 3and contain only the certificate, not the full certificate chain. If you are requesting this
 4from another party, please also request the CA Root Certificate in Base 64 format
 5as it is also required in later steps. Note: you can exit this script now and re-run
 6it later if necessary.
 7
 8Save your signed certificate as vrealize.crt in /Users/chipzoller/Downloads/vrealizecerttool and hit Enter:
 9
10Download your Root CA Certificate and save it as Root64.cer in /Users/chipzoller/Downloads/vrealizecerttool and hit Enter. Optionally, you can exit this script here and resume later:
11
12Please create a PFX file password (store this safely as this will be used when importing accross components)
13
14Enter Password:
We are then asked to enter a password to encrypt the contents of the PFX file. This is the file that will get installed on your Windows IaaS components. Enter a password and continue. Once you do that, the tool will run for a few seconds and spit out all of your files in the correct format with the correct file extensions. How cool is that?!
 1***** Certificate Generation Complete *****
 2Certificates generated for servers:
 3vrademo
 4vrademoid1
 5vrademoweb
 6vrademoman
 7
 8
 9Private Key for vRealize Automation (vCAC) and Identity Appliance
10-----------------------------------------------------------------
11File: /Users/chipzoller/Downloads/vrealizecerttool/vrealize.key
12Installation Method:
13Go to https://vcac-server:5480 and paste into the Private Key box on the SSL page
14Notes: Passphrase is the PFX password you entered earlier
15
16PEM without Private Key for vRealize Automation (vCAC) and Identity Appliance
17-----------------------------------------------------------------------------
18File: /Users/chipzoller/Downloads/vrealizecerttool/vrealize.pem
19Installation Method:
20Go to https://vcac-server:5480 and paste into the Certificate Chain box on the SSL page
21Notes: Passphrase is the PFX password you entered earlier
22
23PFX for vRealize Automation IAAS - IIS
24--------------------------------------
25File: /Users/chipzoller/Downloads/vrealizecerttool/vrealize.pfx
26Installation Method:
27Copy file to all IAAS servers
28Double click the vrealize.pfx file
29Click Next until the wizard finishes, accepting default options
30
31JKS for vRealize Automation Application Services
32------------------------------------------------
33Files: /Users/chipzoller/Downloads/vrealizecerttool/appdui.jks, /Users/chipzoller/Downloads/vrealizecerttool/server.xml
34Installation Method:
35Copy appdui.jks to /home/darwin/keystore/ on the appliance
36Copy server.xml to /home/darwin/tcserver/darwin/conf/ on the appliance
37Edit /etc/init.d/vmware-darwin-tcserver and change:
381. server.external.ws.url=<App Service IP>:8444
392. external.keystore=/home/darwin/keystore/appdui.jks
403. external.cert.alias=ssl
41chown darwin /home/darwin/keystore/appdui.jks
42chmod 400 /home/darwin/keystore/appdui.jks
43service vmware-darwin-tcserver restart
44
45JKS for vRealize Orchestrator (vCO)
46-----------------------------------
47File: /Users/chipzoller/Downloads/vrealizecerttool/jssecacerts
48Installation Method:
49Copy jssecacerts to /etc/vco/app-server/security/ on each vCO appliance and run the following commands:
50chmod 600 /etc/vco/app-server/security/jssecacerts
51chown vco:vco /etc/vco/app-server/security/jssecacerts
52vcac-config vco-configure (embedded vCAC version only)
53service vco-configurator restart
54service vco-server restart
55
56PEM with Private Key for vRealize Operations (vC Ops)
57-----------------------------------------------------
58File: /Users/chipzoller/Downloads/vrealizecerttool/vrealize-full.pem
59Installation Method:
60Paste the PEM file contents into the Certificate box when requested by the installation wizard
If you ran this on your Mac and you need the certs for Application Services and vRO, double check that the appdui.jks and jssecacerts files were created successfully. If you don’t care, disregard that since you’ll delete them anyhow.
Great! Now we have all the certs we need. Let’s get into actually using them.
For the Linux-based appliances in the vRealize Automation stack, we’ll specifically need the vrealize.pem and vrealize.key files. Assuming that this is a new install of vRealize Automation, we’ll begin with the identity appliance.
Installing certificates into Identity Appliance
Once we’ved logged into the VAMI, we have to configure and initialize SSO before we can insert the newly-generated certificate. Head over to the SSO tab and SSO sub-tab to complete the information. Once done and SSO is started, we can click the SSL sub-tab and work with certificates.
Over on the SSL page, we can choose the option to “Import PEM encoded Certificate”.
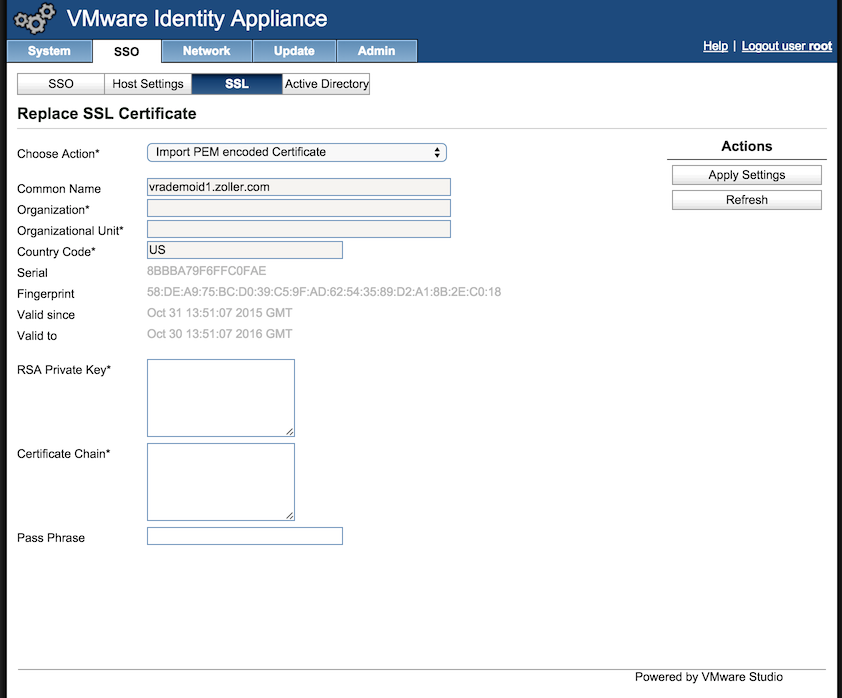
Once we’re here, we need to copy the contents of vrealize.key into the RSA Private Key field and enter the passphrase used when running the script. We then copy the top block of text in the vrealize.pem file into the Certificate Chain box. Make sure not to copy both of them as this will cause the replacement action to fail.
Click the Apply button and, if all goes as planned, you should get a nice green success message.

Now that we have this step complete, we can finish the few configuration changes to the identity appliance, the most important of which is time synchronization. Make sure you’ve correctly set the time zone of the appliance, and a valid NTP server with which to sync the clocks. Both this and the front-end appliance should have identical settings in this regard.
Installing certificates into Front-end Appliance
Ok, now we move on to the front-end appliance to insert its new certificate.
Login to the VAMI and navigate to the vRA Settings main tab, then to the Host Settings sub-tab. We need to update the host name to ensure it is the same as what was on the CSR because we’re putting it behind a load balancer. Down on the SSL Configuration screen, we choose the Import radio button where we’ll do essentially the same thing as on the identity appliance.
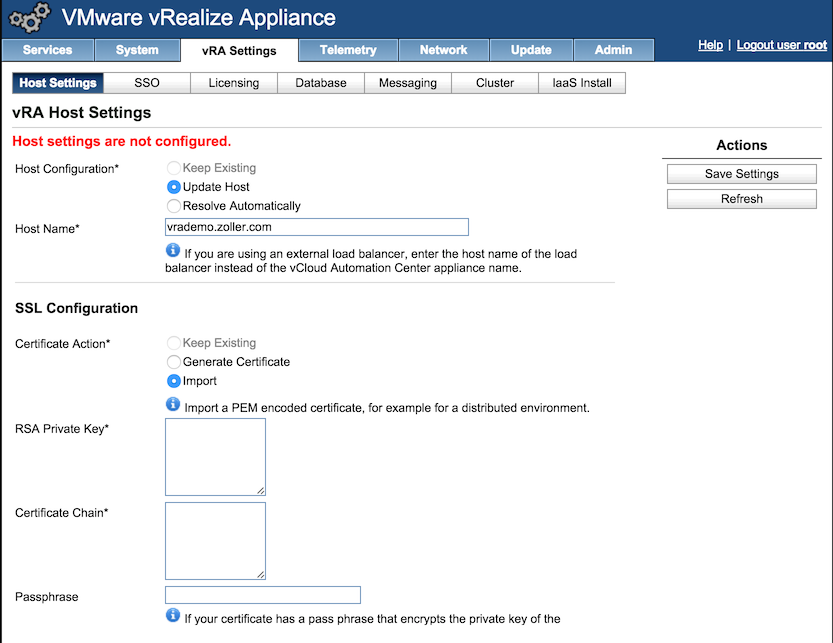
If everything is right, after we click Save Settings, we should be greeted with another cozy green success message.

We can now go over to the SSO section and connect it to our identity appliance.
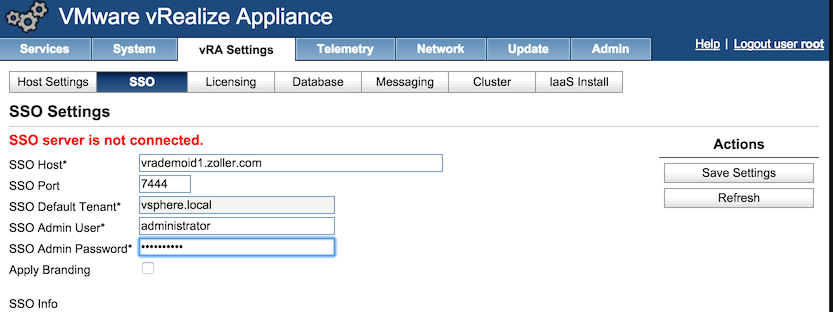
Once we click Save Settings, we’ll be prompted to accept the certificate on the identity appliance that we just installed.
It will take several minutes for the SSO settings to validate and configure themselves and during this time the front-end appliance will ramp up CPU activity as it configures and then starts all its services. But once it’s done, we should get another success message, and the SSO Info section should now show “Connected” under Status.

We can now finish the rest of the appliance configuration, which I won’t cover here, but don’t forget about the time sync parts.
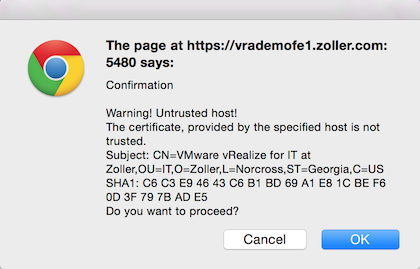
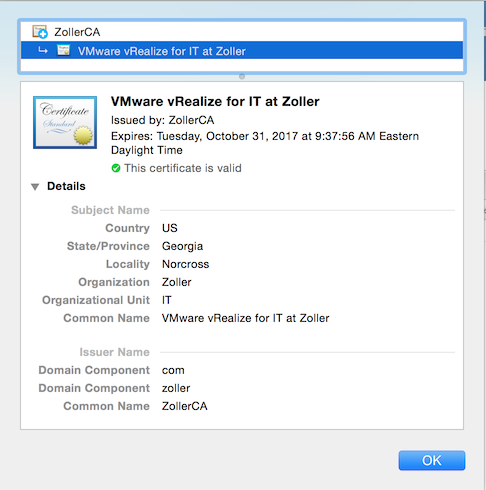
You should now be able to login to the front end without any harassment about untrusted certificates. Once you do so, you can inspect what the browser presents to you if so inclined.
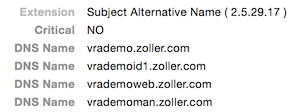
Scroll down to view the Subject Alternative Name (SAN) extensions which shows all the hostnames you presented when running the script.
Installing certificates into IaaS Servers
We can now do the final piece in the certificate installation journey, which is to install the PFX file in the Windows IaaS components.
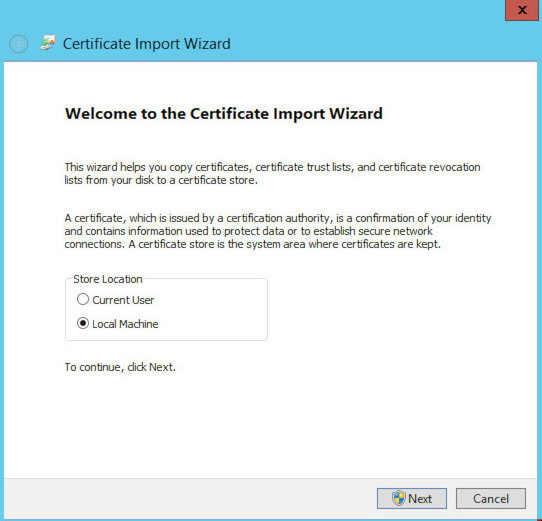
Once we have copied the vrealize.pfx file to the IaaS box, we double-click the certificate to import it into the local store. Choose the Local Machine option and click Next.
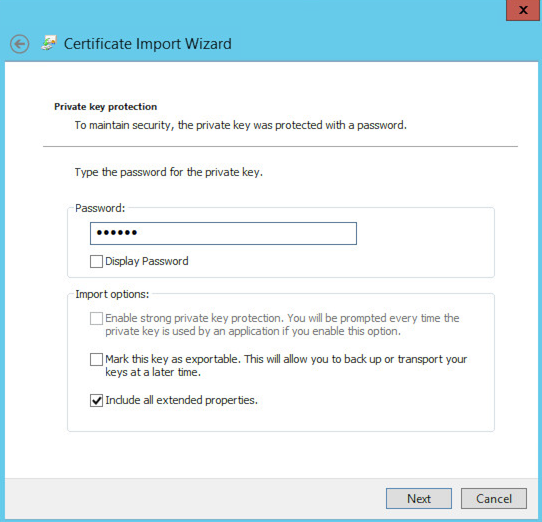
Come to where you are now prompted for the passphrase set earlier, and leave the box checked to “Include all extended properties”.
Choose the radio button to “Place all certificates in the following store” and click the Browse button to find the Personal store. Click OK then Next.
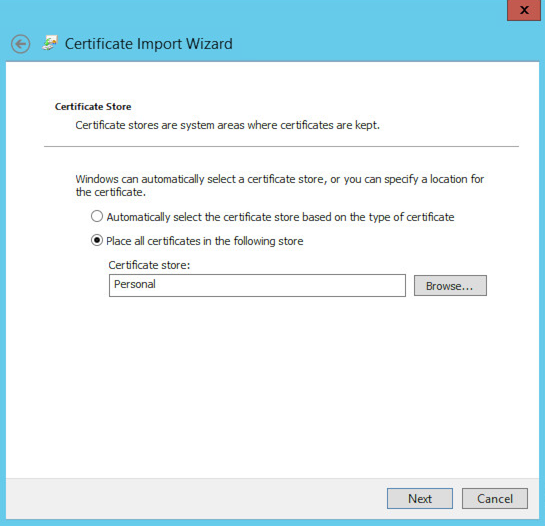
Click Finish and the import should be successful.
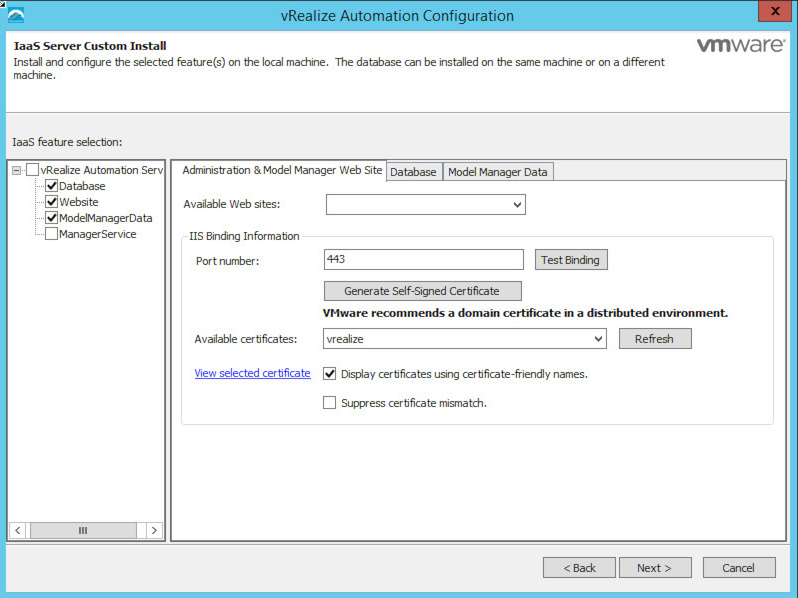
Now with that done, we can run the IaaS installer and we should be able to select this new certificate for use during the installation process. Note in this example, I’m just using a single IaaS box called “vrademoweb”, but remember you’ll have to repeat this process for any other distributed components other than the DEMs.
We’ll do a custom install and choose just the IaaS components. On the next screen, we will select everything except the Manager Service. When you click the tab for Administration & Model Manager Web Site, under the Available Certificates box we should see our new certificate called simply “vrealize”. Check the box for “Suppress certificate mismatch” since, if you’re using a VIP, the local hostname will differ from what the certificate says.
Once you put in your configuration and run through the installer, it should succeed and be fully certified with the front-end components.
Congratulations are in order as you have just successfully defeated the certificate generation and installation process!
The vRealize Certificate Generation Tool is certainly very handy and makes the task of working with certs a whole lot quicker and easier. I recommend this as the way to go for anyone looking to create signed certificates for anything in the vRealize suite.