Deploying Harbor on Photon OS

Overview
Although there are many great container and artifact registries out there, Harbor has quickly risen to the front of those ranks not only because of its accessibility and ease of use, but because of its feature set. It's now one of the most popular registries out there and has recently graudated from the CNCF which is a major accomplishment and shared by only a handful of other projects (most notable being Kubernetes itself). Harbor has been adding some great features lately, including a huge one with OCI support in 2.0 for artifacts which opened up the door to far more than just container images. Version 2.1 was very recently released which contained another bevvy of fine features including the proxy cache support which caught my eye. I've used Harbor for a few years now in a variety of ways, including with TKGI (Enterprise PKS) and more recently coming with vSphere with Tanzu Standard (entitled through VCF). As I've spent time with Harbor, I've come to the realization that it's often better to "roll your own" versus relying upon a prescriptive solution's version for a variety of reasons. I'll go into those in a minute. But Harbor isn't that straightfoward to run standalone, on your own, outside of Kubernetes, especially if you want it for production use. In this blog, I'm going to walk through the process to deploy Harbor in a production-grade fashion, standalone, on Photon OS. Let's go.
Why Install Harbor Standalone
One of the questions you might be asking is, "why would I want to install Harbor in a standalone fashion?" especially if you are using a solution which deploys it for you out of the box. It's a fair question, and there are a couple of reasons. First, it's likely that Harbor–especially as time goes on–will be servicing more functions than just the solution which pre-packaged it. Although it and other artifact repositories normally start out as purpose-built things, they gradually spiral out of that use case into others. And you can't transform a Harbor baked into one of those solutions and cut its cord. Its lifecycle is inextricably linked from the moment you roll it out. Second reason is that with these solutions which conveniently give you Harbor, they're all opinionated, which means the Harbor it provides is prescriptive. That means there are things you aren't allowed to do if the lifecycle management experience is to be maintained. There has to be some guardrails around its use, otherwise things get blown up. Speaking of blown up, you really don't want to be in a position where the upgrade of one solution takes out another. And the third main reason is that with those prescriptive solutions, you don't have access to the latest upgrade or critical bug fixes in a timeline that often works for you. You're stuck with what you've got until the vendor supplies you with something else. And as quickly as these CNCF projects move, both in terms of feature velocity and fixes, if you're running it in production and placing great demands upon it, you'll likely need that ability to grab the latest updates.
When it comes to deploying a standalone Harbor, your main choices are to deploy it to a Kubernetes environment or not. Deployment to K8s is a good idea if you already have a management cluster and want to assume the overhead of operating K8s. It has to run inside a K8s cluster, which can potentially mean some cyclical dependencies especially for air-gapped environments. A better option might be to install it in an isolated fashion on a traditional virtual machine where there are no other dependencies. It doesn't need K8s to run itself, it doesn't depend on another solution for its patches or updates, and it doesn't require additional storage. In this regard, deploying Harbor in a detached and standalone fashion could be very attractive for home labs and enterprises alike.
What I'm showing here is designed to be a production-grade installation of such a detached, standalone fashion. I've chosen to use Photon OS as it is a security-focused, slimmed down, and fast Linux distro which is perfect for a single-purpose app like Harbor. With this method, you'll be able to create a robust and reliable installation of Harbor that's easier to maintain going forward, and that includes important things like backups.
Installing Harbor on Photon OS
1. Deploy and Prep Photon OS
Ok, enough of the overture. If you're reading this you probably care about the main act.
I'm recommending Photon OS here, so if you don't already have a template in your (assuming vSphere here) library, go get it now here. I'm going to recommend the OVA as it's simpler and quicker. As of this writing, the current version is 3.0 Revision 2 Update 3. It's available as an OVA in hardware version 11 with standard BIOS or hardware version 13 with UEFI. I chose the hardware 11 version because I had an issue with the UEFI package in earlier tests.
After uploading the OVA to your vSphere as a template, a couple of the things you may want to do include:
- Removing the floppy drive (you'll need to use the Flex/Flash client as, embarrasingly, the HTML5 client doesn't include this ability)
- Update the hardware to something past 11, which was a 6.0 compatibility level
- Change the OS type to Photon OS (edit settings => VM Options => General Options)
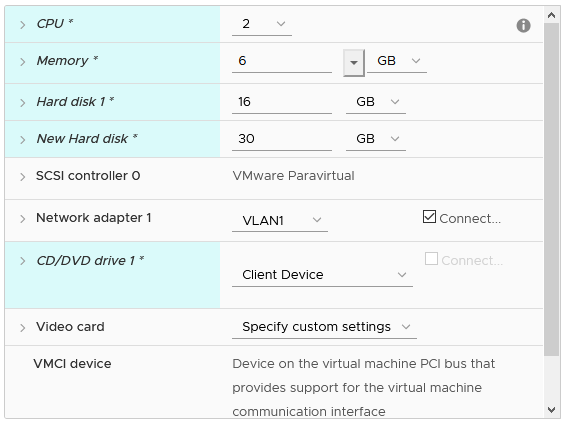
Create a customization spec for Linux (if you don't already have one) that allows for setting of a static IP. This will save some keystrokes in the guest later. Deploy a new VM from the Photon OS template, supply the name, and IP address. For whatever reason, the name I selected in the deployment wizard did not take for this OVA but it did for the UEFI version. We can change that in a second. When deploying the VM, since this is for production we need to ensure it has reasonable resources. A minimum of two vCPUs and four GBs of memory are recommended, but I'll go for a 2 x 6 here. Lastly, we need a second disk to be used for the artifact and database storage. Although it's perfectly fine to put this on the same filesystem, it's not a good idea. By having the artifact store on a separate disk, it makes resizing and protection easier and more predictable.
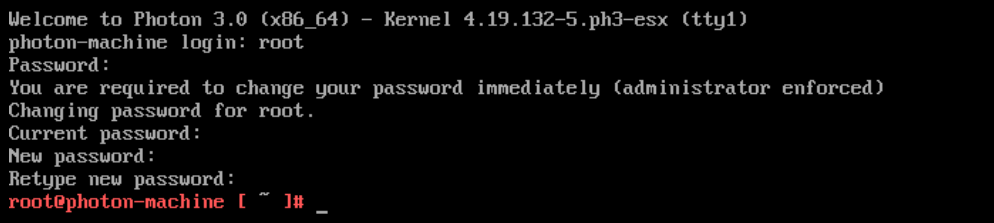
With your newly-deployed Harbor VM running, let's open the web console and perform the initial login so we can change the password. By default, Photon OS ships with its root password set to changeme. Once logged in as root, you'll be forced to change it. Do so now in the web console so we can flip over to SSH access.
With that done, ensure the Harbor VM has the correct static IP here. If it didn't pick up the host name we'll change that in a second.
Login via SSH. If you need to change the host name, do so now. I'm calling this system "harbor3" so substitute for your name where you see this throughout the instructions.
Don't forget the handy copy button on code blocks in this article to quickly try these commands out for yourself!
1hostnamectl set-hostname harbor3
Next, we should prevent the root password from expiring. By default, Photon OS has the maximum expiry at 90 days. You should change this to align with your company security policies, if applicable.
1chage -M 9999 root
Photon OS is fairly locked down by default. Although SSH is enabled, ICMP echoes (i.e., ping responses) are not. To fix that, we need to update firewall rules.
1iptables -A INPUT -p ICMP -j ACCEPT
2iptables -A OUTPUT -p ICMP -j ACCEPT
3
4iptables-save > /etc/systemd/scripts/ip4save
You should be able to ping your new Harbor VM and get responses.
Now we should bring this Photon installation fully up-to-date with the upstream repos. Photon OS uses tdnf for its package manager, so let's take care of that. The updateinfo command will get the latest package manifests, and distro-sync will install the newest ones for this version.
1tdnf updateinfo
1tdnf -y distro-sync
Last thing after you've synced with the latest packages is to install a few specific ones that aren't present. The Photon OVA is fairly minimal and doesn't come with much of the otherwise "standard" packages found on other distros such as Ubuntu and Fedora.
1tdnf install -y bindutils tar parted
With everything brought successfully up-to-date, let's reboot for good measure to refresh everything.
1reboot now
There's one last package we need to install before we move on, and it's not in the Photon repos so we'll have to pull it down specifically. That package is docker-compose. Harbor runs as a series of containers, Kubernetes or not, and uses docker-compose to orchestrate this. In order to install it, follow the instructions on Docker's website here. The version of this writing is v1.27.4, so check to make sure the command you run (if copying from the code block) references the latest available version.
1curl -sL "https://github.com/docker/compose/releases/download/1.27.4/docker-compose-$(uname -s)-$(uname -m)" -o /usr/local/bin/docker-compose && chmod +x /usr/local/bin/docker-compose
Once this is run, verify you can execute it and the version is as expected.
1$ docker-compose version
2docker-compose version 1.27.4, build 40524192
3docker-py version: 4.3.1
4CPython version: 3.7.7
5OpenSSL version: OpenSSL 1.1.0l  10 Sep 2019
Last thing on the Docker subject is the engine. Photon OS ships with Docker installed, however it's not set to start up. We need it to run on boot so the containers can launch.
1systemctl start docker
2systemctl enable docker
Ensure you can run docker commands after running this. Easiest is to check the version. As you can see below, we're running 19.03.10.
 1$ docker version
 2Client: Docker Engine - Community
 3 Version:           19.03.10
 4 API version:       1.40
 5 Go version:        go1.13.3
 6 Git commit:        9424aea
 7 Built:             Thu Aug  6 02:54:05 2020
 8 OS/Arch:           linux/amd64
 9 Experimental:      false
10
11Server: Docker Engine - Community
12 Engine:
13  Version:          19.03.10
14  API version:      1.40 (minimum version 1.12)
15  Go version:       go1.13.3
16  Git commit:       9424aea
17  Built:            Thu Aug  6 02:55:27 2020
18  OS/Arch:          linux/amd64
19  Experimental:     false
20 containerd:
21  Version:          1.2.10
22  GitCommit:        b34a5c8af56e510852c35414db4c1f4fa6172339
23 runc:
24  Version:          1.0.0-rc9
25  GitCommit:        d736ef14f0288d6993a1845745d6756cfc9ddd5a
26 docker-init:
27  Version:          0.18.0
28  GitCommit:        fec3683
With the packages taken care of, we turn our attention to the second virtual disk we added. Photon will not automatically bring this online and format it, so we must do so now. The idea is to separate the data filesystem needed by Harbor from the rest of the filesystem used by Photon OS. These steps assume there are two virtual disks attached to your VM and the second disk is the one to be used as the Harbor data store.
Let's verify the second disk is showing and the size corresponds to what we requested in the deployment wizard. 30 GB is what I requested for my second disk.
 1$ fdisk -l
 2Disk /dev/sda: 16 GiB, 17179869184 bytes, 33554432 sectors
 3Units: sectors of 1 * 512 = 512 bytes
 4Sector size (logical/physical): 512 bytes / 512 bytes
 5I/O size (minimum/optimal): 512 bytes / 512 bytes
 6Disklabel type: gpt
 7Disk identifier: 11CDA575-9A6F-49AE-B764-498838FFF697
 8
 9Device     Start      End  Sectors Size Type
10/dev/sda1   2048    10239     8192   4M BIOS boot
11/dev/sda2  10240    30719    20480  10M EFI System
12/dev/sda3  30720 33554398 33523679  16G Linux filesystem
13
14
15Disk /dev/sdb: 30 GiB, 32212254720 bytes, 62914560 sectors
16Units: sectors of 1 * 512 = 512 bytes
17Sector size (logical/physical): 512 bytes / 512 bytes
18I/O size (minimum/optimal): 512 bytes / 512 bytes
As shown above, the 30 GB new disk is referenced at /dev/sdb and it has no partitions on it currently. We'll label and format that now using all of the available disk space.
1parted /dev/sdb mklabel gpt mkpart ext4 0% 100%
Now, we create a file system.
1mkfs -t ext4 /dev/sdb1
You'll get some output which should indicate the operation was successful. If you run another fdisk -l query, you should see our new partition and the filesystem has been created.
Next, we need to create a directory into which this disk will get mounted and then update the fstab entry so it mounts on boot.
1mkdir /data
Update /etc/fstab with the mount information.
1vim /etc/fstab
At the bottom of the file, enter something like this and save the file.
1/dev/sdb1 /data ext4 defaults 0 0
Now, mount the filesystem.
1mount /data
If everything was successful, we should be able to see this mount added to our system.
 1$ df -h
 2Filesystem      Size  Used Avail Use% Mounted on
 3/dev/root        16G  707M   15G   5% /
 4devtmpfs        3.0G     0  3.0G   0% /dev
 5tmpfs           3.0G     0  3.0G   0% /dev/shm
 6tmpfs           3.0G  560K  3.0G   1% /run
 7tmpfs           3.0G     0  3.0G   0% /sys/fs/cgroup
 8tmpfs           3.0G  7.7M  3.0G   1% /tmp
 9/dev/sda2        10M  2.2M  7.8M  22% /boot/efi
10tmpfs           596M     0  596M   0% /run/user/0
11/dev/sdb1        30G   45M   28G   1% /data
There at the bottom is our new disk mounted into /data. We're done with the prep! Let's move along to getting Harbor installed now.
2. Install Harbor
With all of the prep work done, we can get on with installing Harbor. Unfortunately, the Harbor documentation leaves much to be desired in this area so I'm providing a more clear set of steps. Prior to getting the bits pulled down, let's create a few directories.
1mkdir -p /harbor /etc/docker/certs.d/<harbor_FQDN>
In the above, ensure you substitute for your actual fully-qualified hostname there. This creates a new home dir for Harbor and sets up the necessary dirs for Docker cert trust.
Now move into the new dir.
1cd /harbor
If this is an air-gapped system, you'll need to download the offline installer from the Habor releases page and transfer it to this system. Or if it's an online install, you can directly download either the offline or online bundle. I'm going to get the offline bundle for consistency.
1curl -sLO https://github.com/goharbor/harbor/releases/download/v2.1.0/harbor-offline-installer-v2.1.0.tgz
Expand the file to the current dir.
1tar xvf harbor-offline-installer-v2.1.0.tgz --strip-components=1
Harbor uses a file called harbor.yml as its master configuration file, so let's copy the templated one to the final one for later editing.
1cp harbor.yml.tmpl harbor.yml
Next, again since this is a production-grade install, we're going to generate a certificate signing request so we can get proper certificates for our installation. Artifact registries like these must be a center of trust for the content it stores as much as the access patterns. We will need to create a CSR and transport that to our CA for signing. And the cert must have a SAN entry, so ensure it at least has the FQDN. Copy and use this simple script below. Be sure to replace the values in the appropriate sections based on your hostname.
 1cat > /harbor/harbor_cert.conf <<-EOF
 2[ req ]
 3default_bits       = 2048
 4distinguished_name = req_distinguished_name
 5req_extensions     = req_ext
 6[ req_distinguished_name ]
 7countryName               = US
 8stateOrProvinceName       = Kentucky
 9localityName              = Lexington
10organizationName          = Zoller
11commonName                = harbor3.zoller.com
12[ req_ext ]
13subjectAltName = @alt_names
14[alt_names]
15DNS.1   = harbor3.zoller.com
16DNS.2   = harbor3
17DNS.3   = 192.168.1.168
18EOF
19
20openssl req -sha512 -subj \
21"/C=US/ST=Kentucky/L=Lexington/O=Zoller/OU=IT/CN=harbor3.zoller.com" \
22-out /harbor/harbor_req.csr -newkey rsa:2048 -nodes \
23-keyout /harbor/harbor_key.key -config /harbor/harbor_cert.conf
Once you have your certificate in hand, write it out to a file in the /harbor dir called harbor.cert. Ensure you do have the base64-encoded version of the cert.
Now in /harbor you should have your cert file, harbor.cert as well as the key file, harbor_key.key. Last thing to get is the signing or root certificate CA file. We'll call this one ca.crt.
With all three files in your /harbor dir, copy them into /etc/docker/cert.d/<harbor_FQDN>.
1cp harbor.cert harbor_key.key ca.crt /etc/docker/certs.d/harbor3.zoller.com/
Ok, certificates portion is done. Now we must edit the Harbor config file prior to actually running the installer.
Open the harbor.yml file and change at the very minimum the hostname, certificate, and private_key fields to match what you have. For production use like this, you should really change the database.password key as well from something other than the default of root123. Nothing else in the file needs to be changed. If you want to send the Harbor logs to a syslog or other collector destination, look for the external_endpoint section of the file and update as needed. Save the file now.
Now, with all of that done, we can finally hit the green button. Since Harbor is deprecating the Clair vulnerability scanner in favor of Trivy, there's no need to install that component. Let's install with Notary and ChartMuseum, however. Run the below install.sh script with those switches.
1./install.sh --with-notary --with-trivy --with-chartmuseum
If you followed this guide carefully, all the checks should proceed, the Harbor images should be loaded from the local filesystem (if you downloaded the offline installer), and the application should be started by docker-compose. After the installation is complete, give it a minute or so and check that everything is running.
 1$ docker-compose ps
 2      Name                     Command                  State                                      Ports
 3---------------------------------------------------------------------------------------------------------------------------------------
 4chartmuseum         ./docker-entrypoint.sh           Up (healthy)
 5harbor-core         /harbor/entrypoint.sh            Up (healthy)
 6harbor-db           /docker-entrypoint.sh            Up (healthy)
 7harbor-jobservice   /harbor/entrypoint.sh            Up (healthy)
 8harbor-log          /bin/sh -c /usr/local/bin/ ...   Up (healthy)   127.0.0.1:1514->10514/tcp
 9harbor-portal       nginx -g daemon off;             Up (healthy)
10nginx               nginx -g daemon off;             Up (healthy)   0.0.0.0:4443->4443/tcp, 0.0.0.0:80->8080/tcp, 0.0.0.0:443->8443/tcp
11notary-server       /bin/sh -c migrate-patch - ...   Up
12notary-signer       /bin/sh -c migrate-patch - ...   Up
13redis               redis-server /etc/redis.conf     Up (healthy)
14registry            /home/harbor/entrypoint.sh       Up (healthy)
15registryctl         /home/harbor/start.sh            Up (healthy)
16trivy-adapter       /home/scanner/entrypoint.sh      Up (healthy)
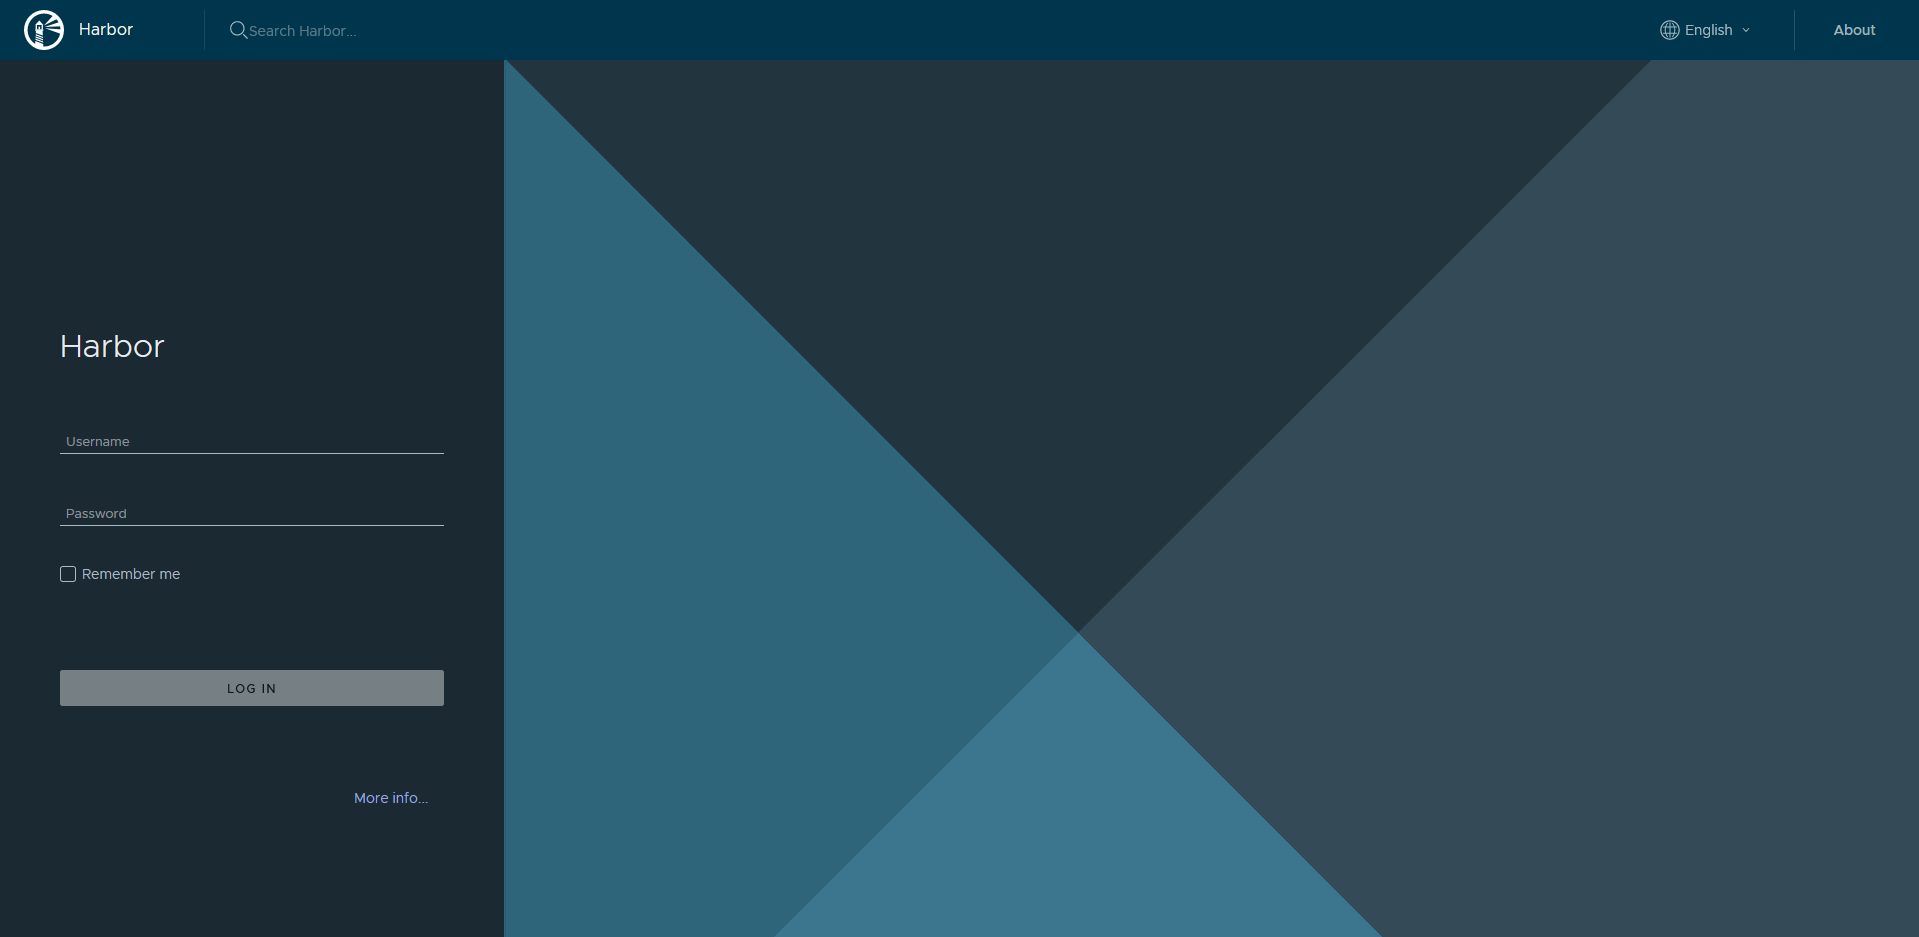
You should now be able to access your Harbor installation by FQDN (remember to add DNS records if you forgot) and have the connection secured with your custom certificate.
Although many would stop here and declare "mission accomplished", there's something else we need to do. If you were to reboot your system now and try to access Harbor once again, you'll find it's broken. The reason is because not all of the containers are starting on system boot. If you did another docker-compose ps inside /harbor you might see results like this.
 1$ docker-compose ps
 2      Name                     Command                  State                 Ports
 3---------------------------------------------------------------------------------------------
 4chartmuseum         ./docker-entrypoint.sh           Exit 137
 5harbor-core         /harbor/entrypoint.sh            Up (healthy)
 6harbor-db           /docker-entrypoint.sh            Up (healthy)
 7harbor-jobservice   /harbor/entrypoint.sh            Up (healthy)
 8harbor-log          /bin/sh -c /usr/local/bin/ ...   Up (healthy)   127.0.0.1:1514->10514/tcp
 9harbor-portal       nginx -g daemon off;             Exit 128
10nginx               nginx -g daemon off;             Restarting
11notary-server       /bin/sh -c migrate-patch - ...   Up
12notary-signer       /bin/sh -c migrate-patch - ...   Up
13redis               redis-server /etc/redis.conf     Up (healthy)
14registry            /home/harbor/entrypoint.sh       Exit 137
15registryctl         /home/harbor/start.sh            Up (healthy)
16trivy-adapter       /home/scanner/entrypoint.sh      Exit 137
Not good. And no matter how long you wait, the containers won't come up. Bad news if you're relying on this.
For whatever reason, which I can't understand, the install script does not provide any sort of boot process to control the bring-up of Harbor, so it's just a free-for-all when the system reboots. Good news is we can fix this by adding a systemd unit file which calls docker-compose upon boot and after critical services like the network and Docker are already started. Run the below to write out a new unit file into harbor.service.
 1cat > /etc/systemd/system/harbor.service <<-EOF
 2[Unit]
 3Description=Harbor
 4After=docker.service systemd-networkd.service systemd-resolved.service
 5Requires=docker.service
 6Documentation=https://goharbor.io/docs/
 7
 8[Service]
 9Type=simple
10Restart=on-failure
11RestartSec=5
12ExecStart=/usr/local/bin/docker-compose -f /harbor/docker-compose.yml up
13ExecStop=/usr/local/bin/docker-compose -f /harbor/docker-compose.yml down
14
15[Install]
16WantedBy=multi-user.target
17EOF
Once done, we need to enable this service so systemd calls it at boot.
1systemctl enable harbor.service
It should respond by creating a symlink in the /etc/systemd/system/multi-user.target.wants/ directory. Now you should be able to reboot your system again and see that Harbor is up and available, and all the containers are properly started.
From here, all that's left is to login to Harbor, change the password, and enjoy!
Wrap-Up
Alright, that was a lot, but I hope this helps in providing you a concrete, easy-to-follow set of instructions on how to bring up your own Harbor that's under your control and in a production-grade manner. If this worked for you, I'd be glad to hear about it; if it didn't work for you, I definitely need to hear about it. In a future blog, I'll look at upgrading Harbor and using some of the newer features.