Getting Started with Tanzu Kubernetes Grid

After VMworld US 2019 when the Tanzu portfolio was announced, there was naturally a lot of excitement for what VMware was doing around modern application development. Fast forward a couple months when more things were announced, names were changed, and Pivotal became part of VMware, and what Tanzu actually is and what the product sets are has been wildly confusing to most. One of those offerings called Tanzu Kubernetes Grid (TKG) has now been released, and so in this article I want to explain what this offering is, what it promises, and, lastly, how to get started with the CLI tool by putting rubber to the road.
What is Tanzu Kubernetes Grid (TKG)
First, let's step back and discuss the name and what it means. Tanzu is a portfolio of products; it's not one single product. Referring to any product as "Tanzu" is therefore not accurate and only adds to the existing confusion. Tanzu Kubernetes is the name referring to VMware's common "distribution" of Kubernetes across all its products that are capable of deploying a Kubernetes cluster (this is the "Run" category within Tanzu). It is a collection of pieces which has the upstream Kubernetes binaries at its core and is specifically designed to integrate with and run best on VMware's platforms. A Tanzu Kubernetes cluster is what you get when you deploy a cluster using vSphere 7 with Kubernetes (specifically the "guest" cluster running as VMs) or Tanzu Mission Control. However, with the Tanzu Kubernetes Grid offering, you get that same flavor of Kubernetes in a standalone form factor delivered through a single CLI tool along with production support. Given the collection of pieces, TKG also gives you the freedom and flexibility to run in the core, in the public cloud, or at the edge. While all these offerings provision Tanzu Kubernetes clusters, TKG is designed for more of a DIY experience where you already have Kubernetes experience in-house and want more hands-on and control. If you want that control but also want access to professional guidance, there is a TKG+ (TKG Plus) offering that additionally gives you access to VMware's Customer Reliability Engineering (CRE) group. Regardless of whether it's TKG or TKG+, neither is a replacement for the other offerings, but merely one possible option for the right customer base.
I just said Tanzu Kubernetes is a common distribution with a collection of different pieces. But you might be asking, "what are those pieces and why do I want them over Kubernetes itself?" Let's take a look at what you get with plain Kubernetes either directly or when using something like kubeadm to provision a cluster.
- Upstream Kubernetes
- (Really, that's it. The rest is up to you.)
Now let's look at what you get with TKG.
- Upstream Kubernetes (the same ones you'd get from GitHub)
- Cluster API, Cluster API Provider vSphere, Cluster API Provider AWS (the bits necessary to declaratively deploy Kubernetes clusters on vSphere or AWS)
- Calico (for networking)
- Cert-manager (for certificates)
- CSI and CPI for vSphere (for integrating with vSphere storage and topology)
- Contour (for ingress)
- Fluent Bit (for logging)
- Dex and Gangway (for authentication)
- Crash-Diagnostics (for troubleshooting)
- TKG CLI (for ease of use)
- Pre-built OS templates (for quicker time-to-clusters)
- Everything signed by VMware (for peace of mind)
- 24/7 support
As you can see, there are many added components which are necessary to run Kubernetes in a production environment, components which you'd otherwise have to figure out yourself. TKG can therefore be thought of as a "batteries included but swappable" Kubernetes distribution. It's also almost entirely open source software, so you're welcome to go to each of the respective projects' repos and inspect the source code if you like, file bugs, and even contribute to fixing them yourself. TKG is also based on the Cluster API (CAPI) project and so what you can do with CAPI you can pretty much do with TKG. And, owing to the fact that it doesn't require NSX-T, you have fewer infrastructure requirements and can therefore easily run this out at the edge.
As I mentioned above, since it has the Cluster API providers for both vSphere and AWS, you can use TKG to deploy cluster to both locations. For vSphere, you need to be on 6.7 U3 to get the benefits of the new cloud-native storage (CNS) functionality. But if you have vSphere 7 with Kubernetes, TKG can connect to your supervisor cluster and be used as a type of remote client to manage and deploy TKG clusters there. Note that as of the 1.0 release, if you connect TKG to a vSphere 7 environment that isn't licensed for the Kubernetes add-on, it is not supported yet will technically work.
How Does It Work
Before jumping right in, let me take you through the architecture of the tool and how it works plus what you can expect to happen.
The user downloads the tkg CLI tool on a workstation (Linux and Mac for now). You then have the choice of deploying the management cluster to either vSphere or AWS on EC2. After populating the details of how they wish to connect and the characteristics of their management cluster, tkg runs kind on their local machine. This serves as a single-node bootstrap cluster into which the Cluster API bits get loaded. With these bits, the kind cluster can carry out the build of the management cluster itself. Once the management cluster is up and running, kind hands off those resources to the newly-running management cluster and then is deleted.
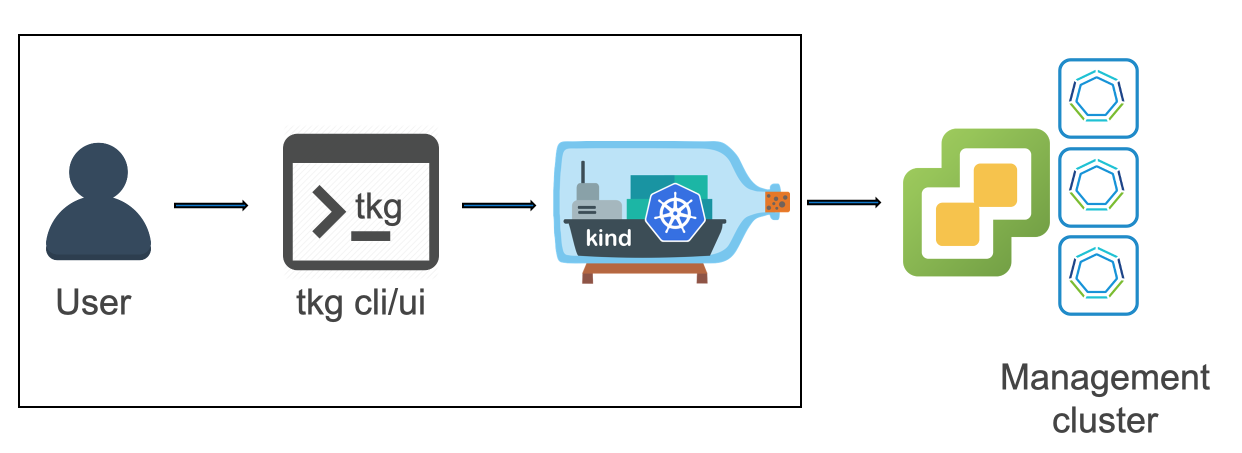
After the management cluster is up, a user then interacts with the tkg tool which speaks to the management cluster to deploy workload ("guest") clusters. These are the clusters that then get provided to developer groups for running their applications.
Getting Started With TKG CLI
With a firm understanding of what TKG is and how it generally works, let's put hands on the keyboard and see it in action.
I'll walk through the steps to build on vSphere in this article. First, we need to make sure a few things are prepared in our infrastructure. These are in addition to the customary info like connecting to vSphere and folders and such.
- Ensure you import the node and HA Proxy templates into your environment.
- Have an SSH key pair ready to go. You'll need the public key half for the deployment.
- Deployment network with DHCP enabled. Right now, DHCP is required for the management cluster when using the
tkgCLI. - Workstation running Linux or Mac.
- Docker installed and running on the workstation. If on Mac, Docker Desktop is a quick way to get up and running.
- Internet access from workstation. By default, the CLI will try to pull images from registries on the Internet.
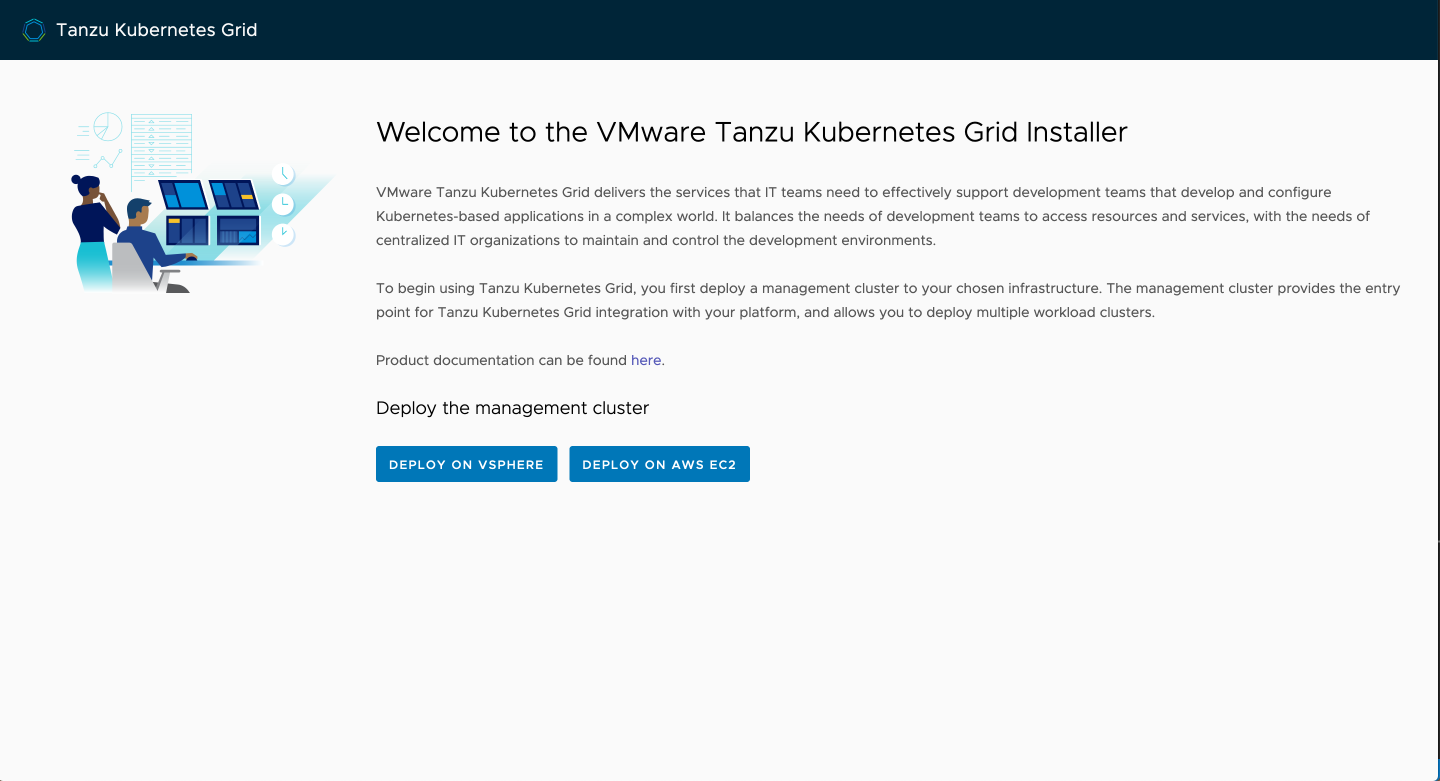
With everything ready to go, let's get into the wizard. There is always the possibility of going directly into CLI mode, but for this demo I'll start with the UI which is probably what most will want to use at least initially.
After downloading the tkg CLI and moving it somewhere in your PATH and setting it to executable, we run it in UI mode with tkg init -u.
1$ tkg init -u
2Logs of the command execution can also be found at: /var/folders/sn/fj76jv0s7ss4wbx4m8v8dgxc0000gn/T/tkg-20200411T103642876646757.log
3
4Validating the pre-requisites...
5Serving kickstart UI at http://127.0.0.1:8080
If it finds the Docker daemon running, it should tell you it's serving the UI on http://127.0.0.1:8080 like above, and open a browser tab for you.
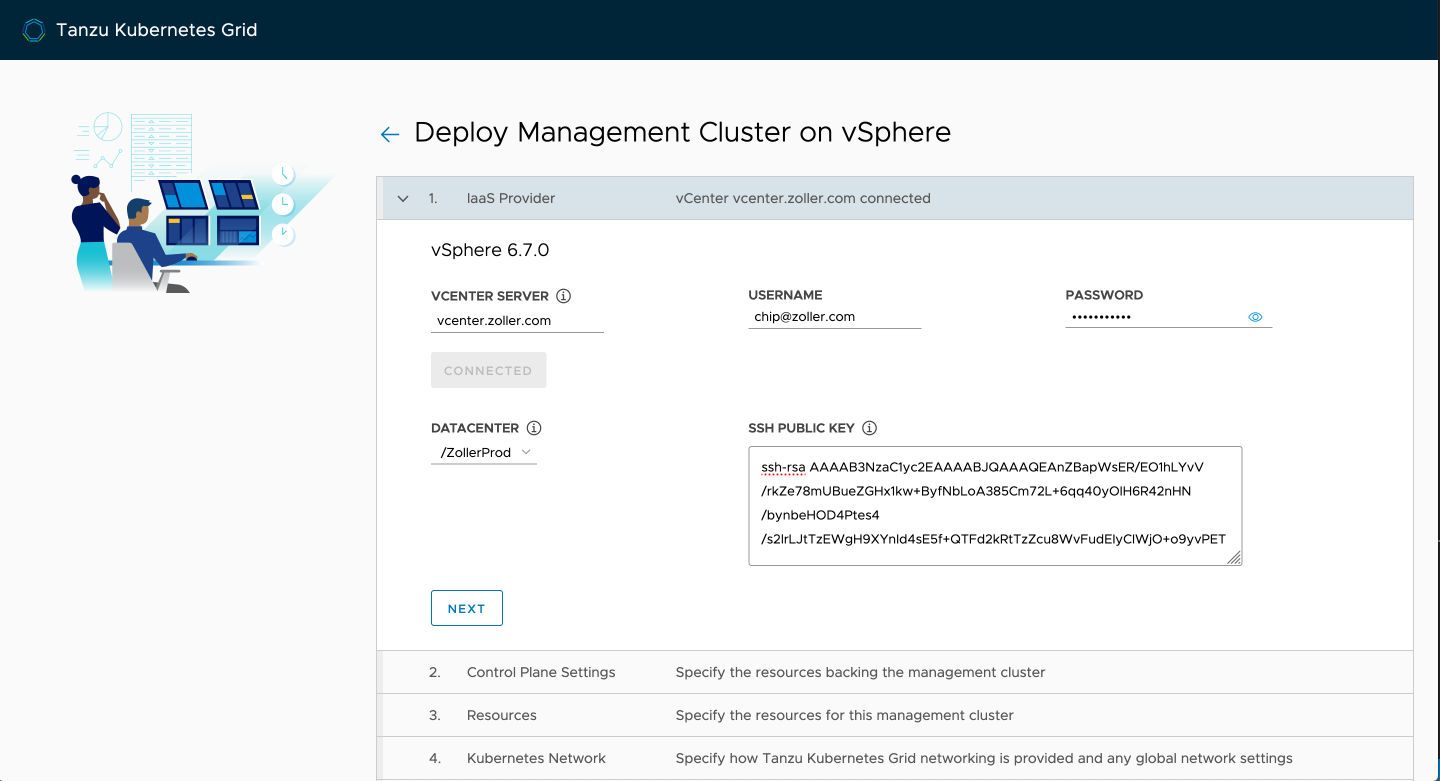
We'll do this on vSphere and plug in our values here. The public half of your SSH key is required in this wizard, and this is the only way you'll be able to access your nodes via SSH. There is no password auth enabled otherwise.
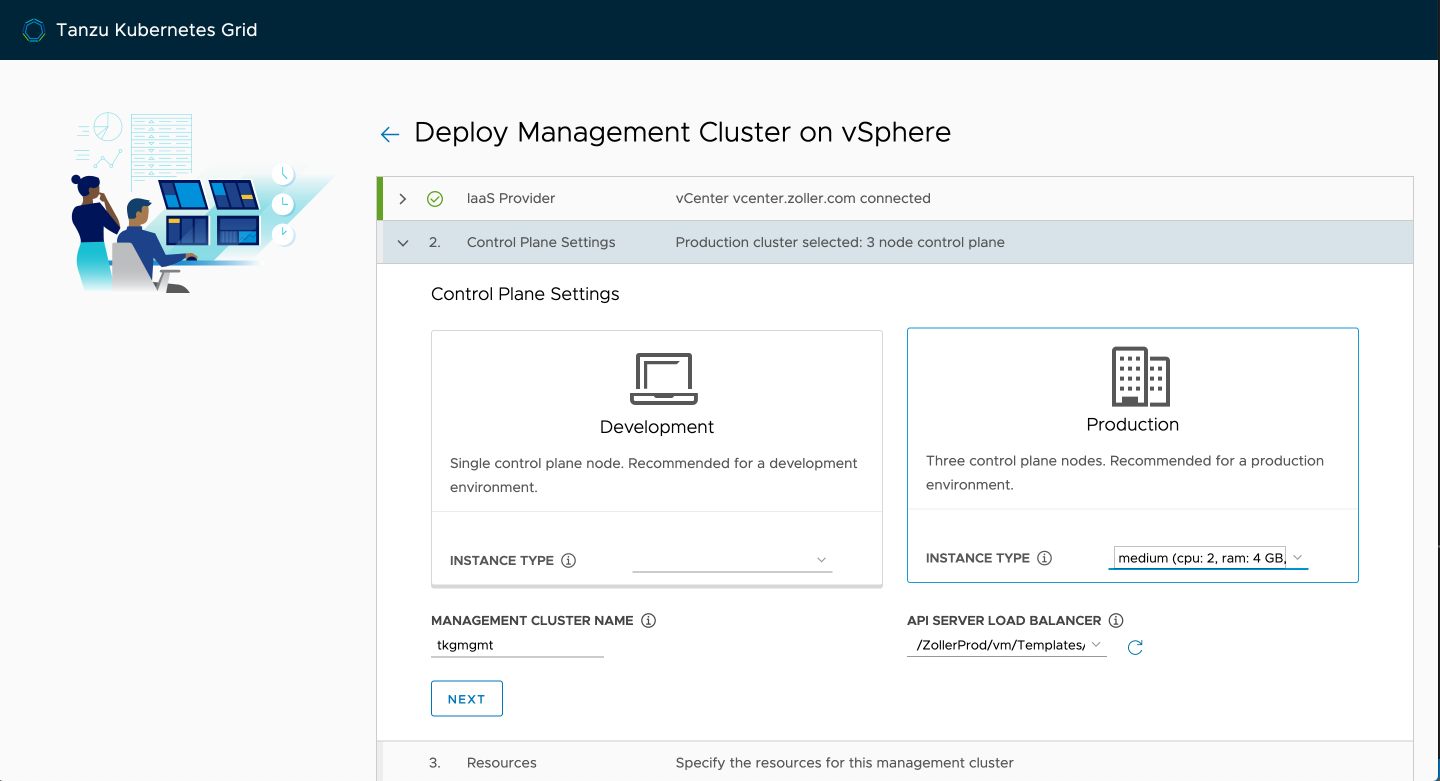
Next, we populate our control plane. When doing this outside of a test or lab environment, it's highly recommend that you deploy an HA control plane of three nodes. This is because later down the line when taking advantage of shared cluster services, they'll run within this management cluster so you want to ensure it's available. Note that even if you deploy a development control plane with a single node, the load balancer still gets deployed. This is to provide a consistent entry point and allows for easy scaling out on day 2. Regardless of which one you choose, you'll get only a single worker.
Name it and select your HA proxy template.
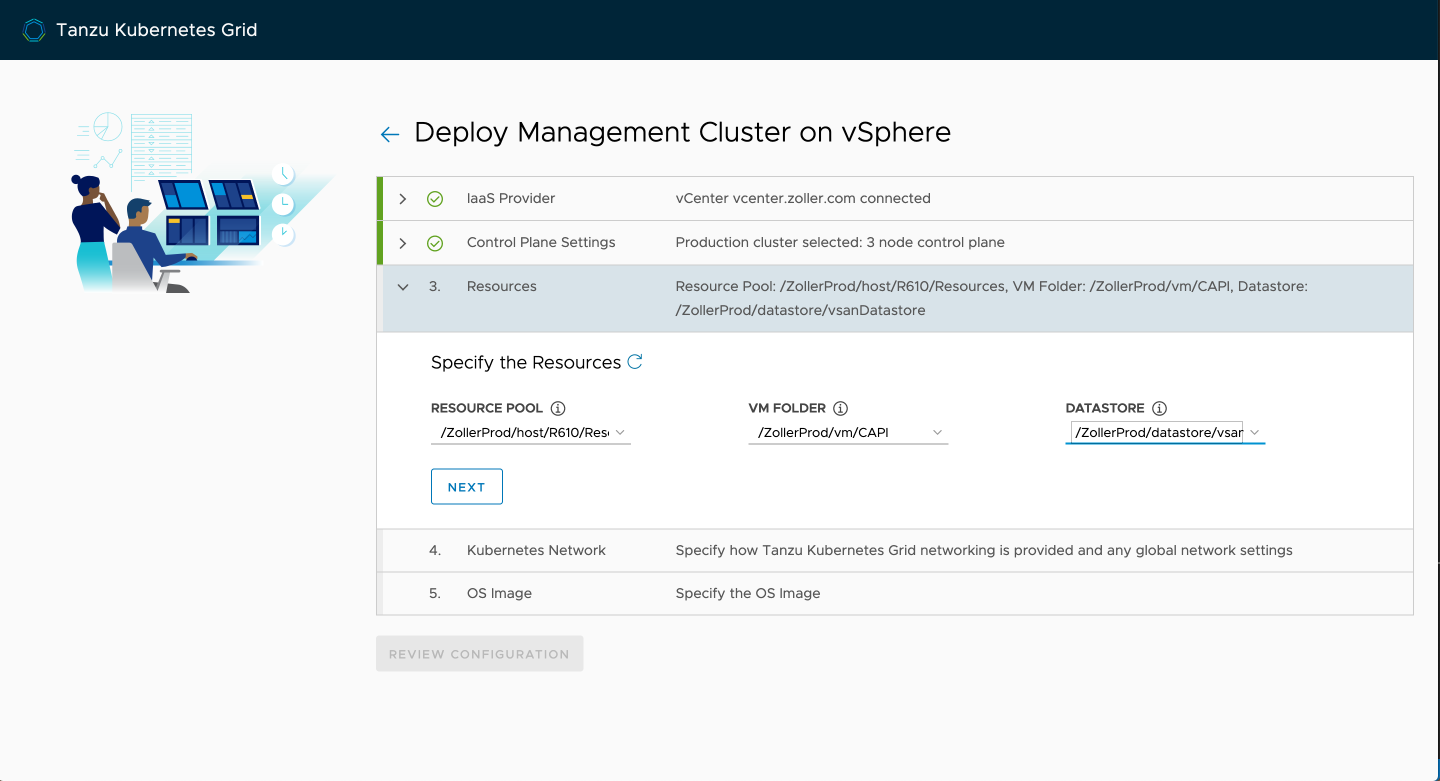
Specify your resource pool (/Resources is the root of the cluster), VM folder, and datastore and click next.
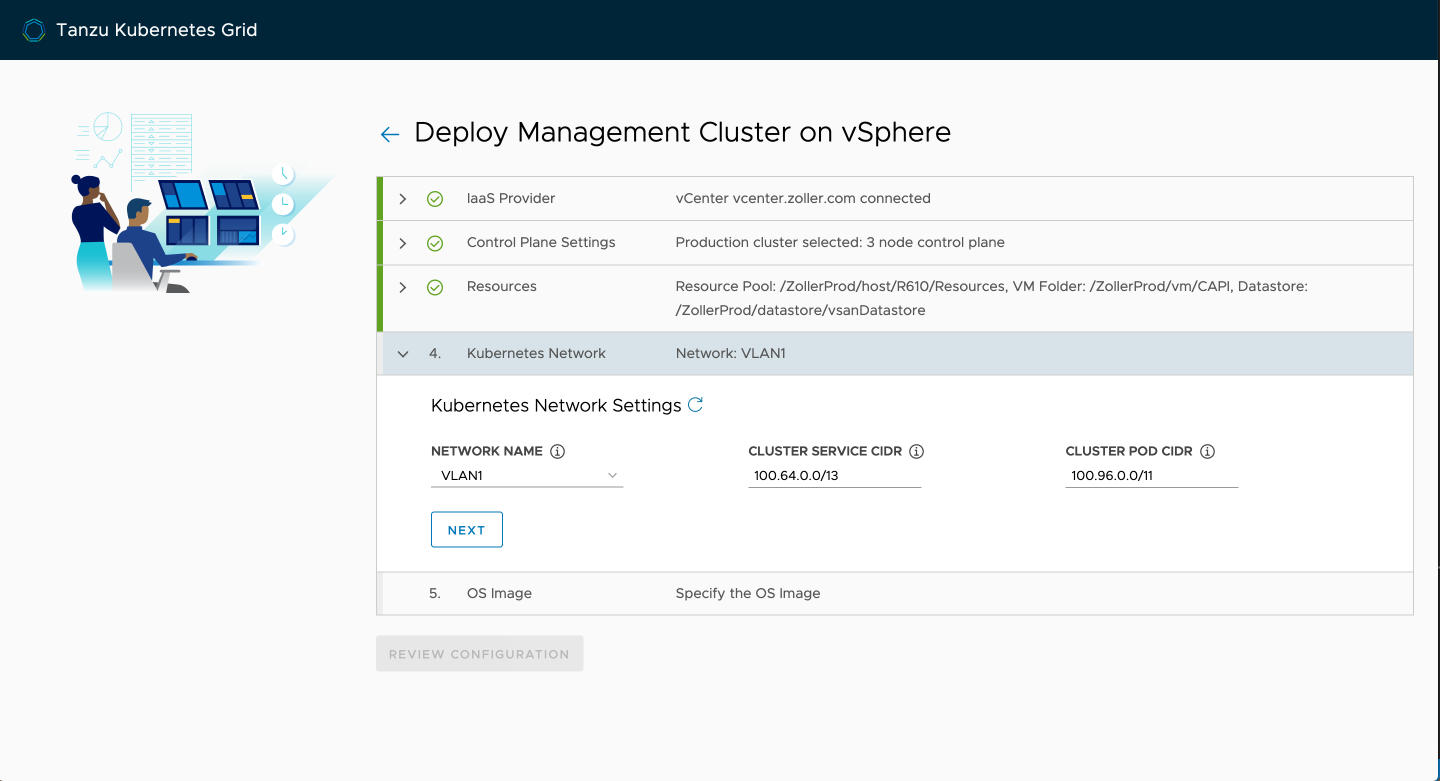
Pick the network that has DHCP enabled and either accept the defaults for the Kubernetes segments or change them to something that doesn't overlap in your environment.
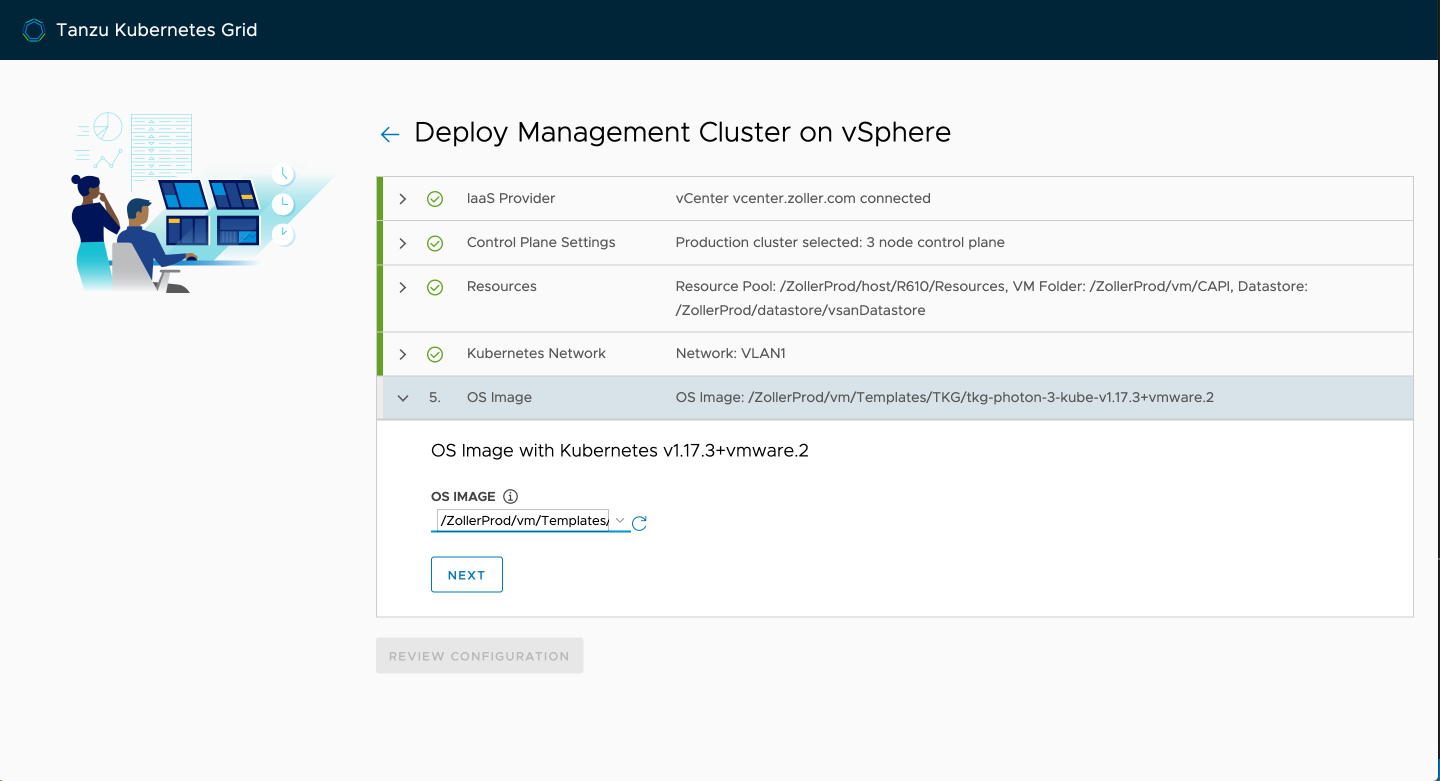
Finally, select the node template you imported earlier and click next.
With everything confirmed, continue on to review and then deploy.
You'll begin to see the wizard kick into action, deploy kind, and then start the deployment process to vSphere. The kind node image is fairly large, so the first time you run the wizard it may take a few minutes to progress depending on your connection.

If you flip over to vCenter, you should see the nodes getting cloned and being powered up. During the course of this process, if you happen to see an error in the vCenter task list saying that "the name already exists," you're fine. This is just the CAPV controller logic attempting to reconcile the state of the cluster and it is harmless. Should be addressed in a forthcoming patch, but the clones should all succeed.
After a few minutes, the process should be complete and the management cluster is ready to go.
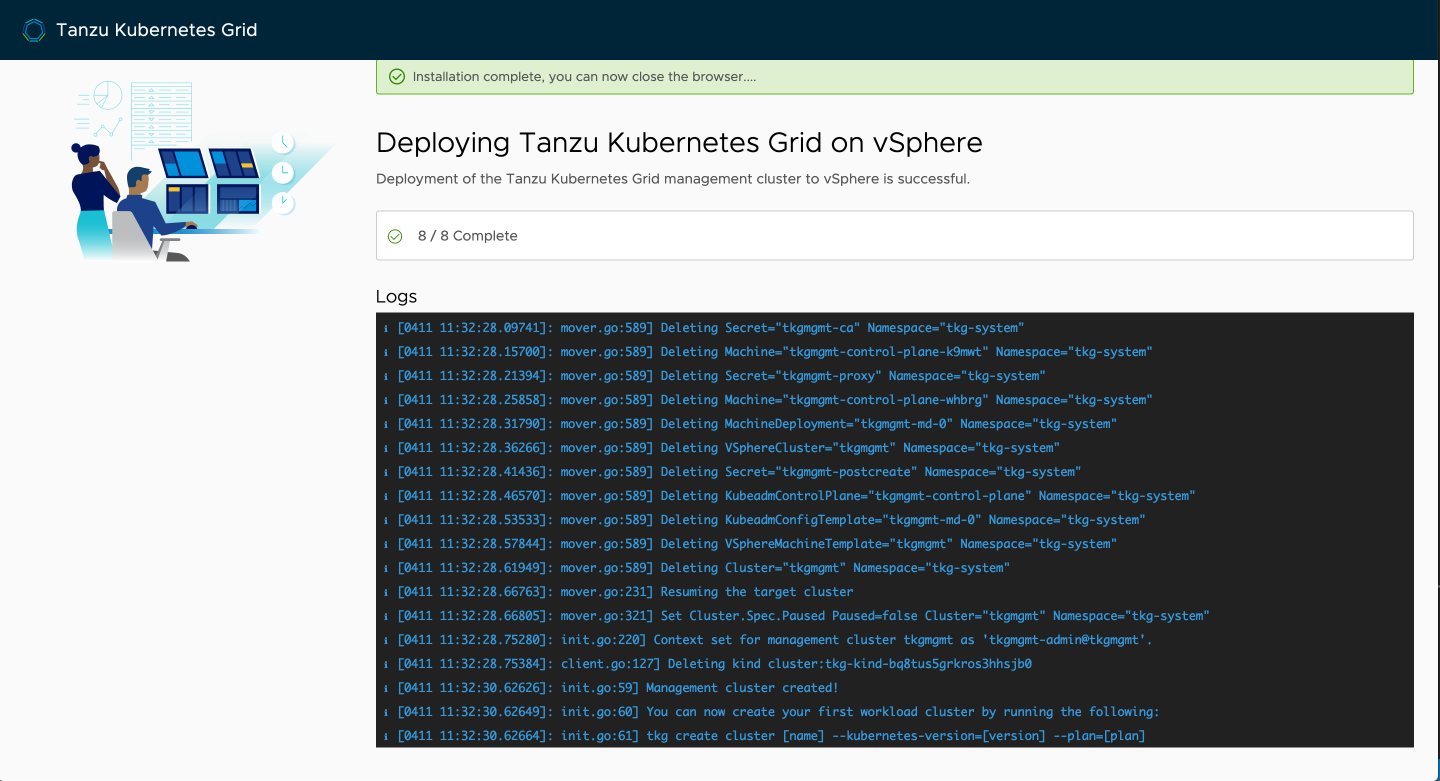
Back at your terminal, you'll see that the process has ended and your kubeconfig will be set to the context of this management cluster allowing you to immediately begin interacting with it.
1$ k get no -o wide
2NAME                            STATUS   ROLES    AGE   VERSION            INTERNAL-IP     EXTERNAL-IP     OS-IMAGE                 KERNEL-VERSION   CONTAINER-RUNTIME
3tkgmgmt-control-plane-k9mwt     Ready    master   37m   v1.17.3+vmware.2   192.168.1.178   192.168.1.178   VMware Photon OS/Linux   4.19.112-1.ph3   containerd://1.3.3
4tkgmgmt-control-plane-whbrg     Ready    master   35m   v1.17.3+vmware.2   192.168.1.179   192.168.1.179   VMware Photon OS/Linux   4.19.112-1.ph3   containerd://1.3.3
5tkgmgmt-control-plane-wx2bn     Ready    master   40m   v1.17.3+vmware.2   192.168.1.176   192.168.1.176   VMware Photon OS/Linux   4.19.112-1.ph3   containerd://1.3.3
6tkgmgmt-md-0-5b89776dd9-gtzbx   Ready    <none>   37m   v1.17.3+vmware.2   192.168.1.177   192.168.1.177   VMware Photon OS/Linux   4.19.112-1.ph3   containerd://1.3.3
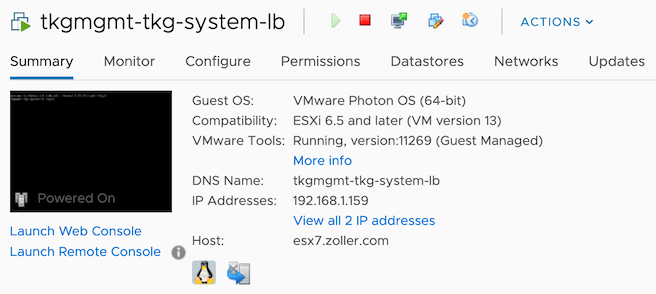
You can see we've got our three control plane nodes and one worker. The load balancer is not a Kubernetes node type so it won't show. However, you can see it has been configured as the entrypoint into the cluster.
1$ k cluster-info
2Kubernetes master is running at https://192.168.1.159:6443
3KubeDNS is running at https://192.168.1.159:6443/api/v1/namespaces/kube-system/services/kube-dns:dns/proxy
Once the management cluster is available, the tkg CLI has created a number of files for you in your home directory, including, most importantly, a config.yaml file. This is the file containing the answers to the wizard you just completed in the UI and is used for subsequent runs of guest cluster creation. There are also a number of cluster-template files which are the blueprints or "flavors" of the types of workload/guest clusters you can create. More on that in another article, however.
 1$ tree ~/.tkg/
 2/Users/chipzoller/.tkg/
 3├── config.yaml
 4└── providers
 5    ├── README.md
 6    ├── bootstrap-kubeadm
 7    │   └── v0.3.3
 8    │       └── bootstrap-components.yaml
 9    ├── cluster-api
10    │   └── v0.3.3
11    │       └── core-components.yaml
12    ├── config.yaml
13    ├── control-plane-kubeadm
14    │   └── v0.3.3
15    │       └── control-plane-components.yaml
16    ├── infrastructure-aws
17    │   └── v0.5.2
18    │       ├── cluster-template-dev.yaml
19    │       ├── cluster-template-prod.yaml
20    │       └── infrastructure-components.yaml
21    ├── infrastructure-tkg-service-vsphere
22    │   └── v1.0.0
23    │       ├── cluster-template-dev.yaml
24    │       └── cluster-template-prod.yaml
25    ├── infrastructure-vsphere
26    │   └── v0.6.3
27    │       ├── cluster-template-dev.yaml
28    │       ├── cluster-template-prod.yaml
29    │       └── infrastructure-components.yaml
30    └── provider-bundle
31
3214 directories, 14 files
Now that the management cluster is set up, we can begin to very easily build workload clusters. Out of the box, we have a dev and a prod plan we can use. The dev plan is a single control plane and single worker while the prod is three control planes and a single worker. By issuing the command tkg create cluster <cluster_name> -p dev we can get such a cluster. If we wanted to maybe add on a second worker node to get two rather than one, we can simply add the -w flag along with the number of total workers (i.e., -w 2).
 1$ tkg create cluster czdevtest -p dev
 2Logs of the command execution can also be found at: /var/folders/sn/fj76jv0s7ss4wbx4m8v8dgxc0000gn/T/tkg-20200411T161624262049827.log
 3Creating workload cluster 'czdevtest'...
 4
 5
 6Context set for workload cluster czdevtest as czdevtest-admin@czdevtest
 7
 8Waiting for cluster nodes to be available...
 9
10Workload cluster 'czdevtest' created
After a few minutes, the cluster from that plan has been created and our context is set to it. Let's test it out.
1$ k get no
2NAME                              STATUS   ROLES    AGE     VERSION
3czdevtest-control-plane-rw5sk     Ready    master   3m11s   v1.17.3+vmware.2
4czdevtest-md-0-85c4ddf9c5-dfzdz   Ready    <none>   90s     v1.17.3+vmware.2
Simple. Done.
Lastly, although this context has been conveniently merged into our own local kubeconfig, let's say we want to hand this over to another user so they can get in. Keeping in mind you'll be giving over a role with cluster-admin privileges, it's very simple with the following.
1$ tkg get credentials czdevtest --export-file czdevtest.kubeconfig
2Credentials of workload cluster czdevtest have been saved
3You can now access the cluster by switching the context to czdevtest-admin@czdevtest under czdevtest.kubeconfig
We should now be able to perform the last command but pointing to the exported kubeconfig file called czdevtest.kubeconfig. Let's test.
1$ k get no --kubeconfig czdevtest.kubeconfig
2NAME                              STATUS   ROLES    AGE     VERSION
3czdevtest-control-plane-rw5sk     Ready    master   3m58s   v1.17.3+vmware.2
4czdevtest-md-0-85c4ddf9c5-dfzdz   Ready    <none>   2m17s   v1.17.3+vmware.2
And there we go.
Hopefully this was a pretty easy article to follow and explained what Tanzu Kubernetes Grid is and what it can do. In the future, we'll look at some of the internals as well as more advanced use cases and functionality.